
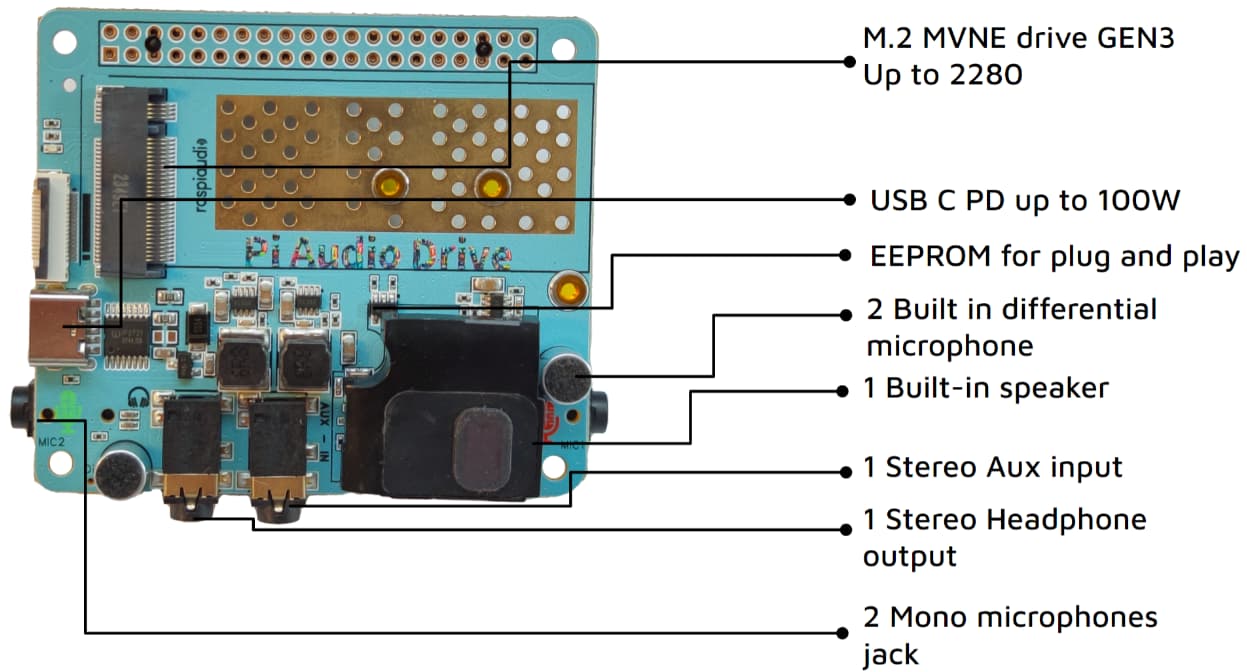
This is the installation guide for the Pi Audio Drive. You can find the product page here.
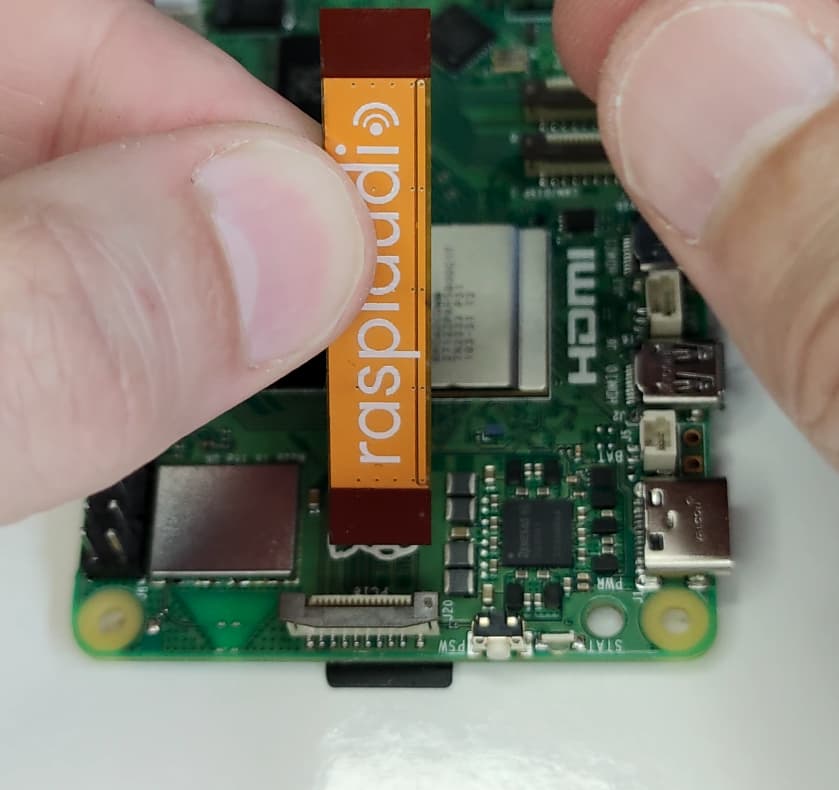
Step 1: Physical Installation - Connecting Your Drive
Please follow the video tutorial for detailed instructions:

The important part is to connect the cable as shown below:
Step 2: Using Your Drive as a Primary Drive
Here is the video tutorial for this step:

In a nutshell:
-
Install the Pi OS on an SD card using the Raspberry Pi Imager.
-
Open a terminal and type:
lsblkYou should see your NVMe drive listed.
-
Use the Raspberry Pi Imager to burn the Pi OS onto your NVMe drive.
-
In a terminal on your Raspberry Pi, run:
sudo raspi-configUnder Advanced Options > Boot Order, choose NVMe/USB boot. Also, select PCIe speed - GEN3. T
-
Reboot, go thru the install process and enjoy your super fast Pi OS!
In the video the command for benchmarking is:
sudo curl https://raw.githubusercontent.com/TheRemote/PiBenchmarks/master/Storage.sh | sudo bash
Then check compatible NVME drives here tested this way target some hardrives with score in the 50000 range: Solid State Drives (SSD) - Page #1 - pibenchmarks.com
I have sucessfully tested those drives :
KingSpec 512GB M.2 2230 PCIe Gen4x4 NVMe
Patriot P300 M.2 PCIe Gen 3 x4
KingSpec 2230 SSD 512GB
Lexar 1TB NM790 SSD PCIe Gen4
Note that some manufacturers change sometime internal componenent of drives while keeping the same part number, so there is still a slight incompatibility probability, order at a place where you can send it back if it does not work.
Step 3: Using the Audio
Check the video :

The good news is that you don’t need to load any complex drivers as the EEPROM is auto configuring it. On your desktop on the top right corner you should see a speaker and a microphone ![]()

Then you an use our predefined settings to set the correct volume to the On-board Speaker, or in the headphone
git clone https://github.com/RASPIAUDIO/Pi-Audio-Drive
cd Pi-Audio-Drive
sudo alsactl restore -f MIC_HP_SPK
Then you can test the audio using this command
speaker-test -l5 -c2 -t wav
list recording device
cho “Available recording devices:”
arecord -l
recording :
arecord -D hw:2,0 -d 4 -r 48000 -c 2 -f S16_LE record_stereo_mic.wav
Playing :
aplay record_stereo_mic.wav
Store your Alsa configuration :
sudo alsactl store -f myAlsaConfig
run automatically this at startup if you want