This is the user guide for 8xOUT for Raspberry Pi 5
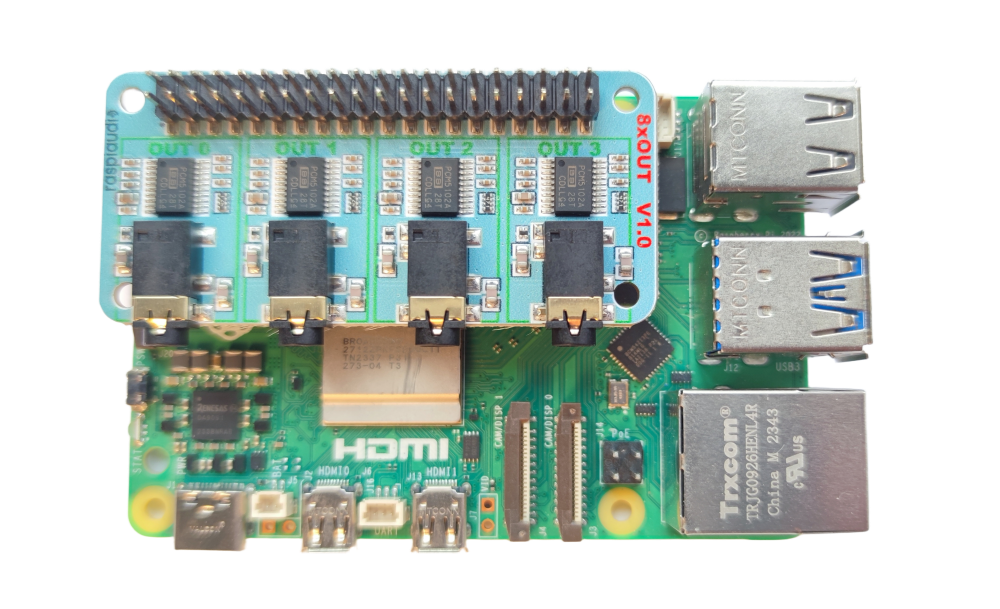
This DAC offers 8 channels of high-quality analog audio output (4 stereo pairs) via four TI PCM5102A DACs. This innovation is ONLY possible with the Raspberry Pi 5.
Insert the 8xOUT into your RPi 5 like this:
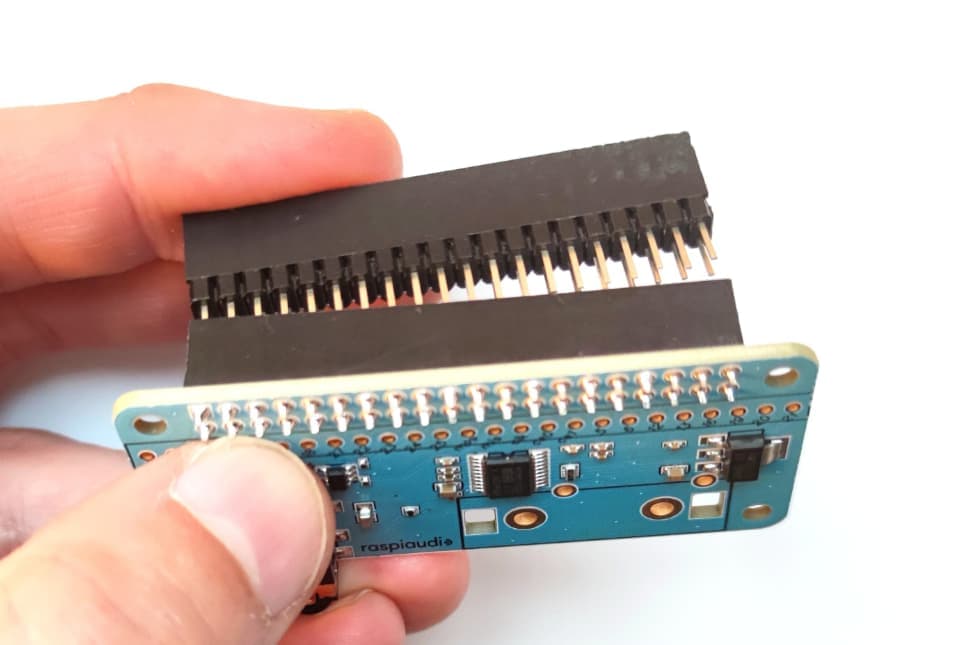
To use it with the official case, first insert the riser:
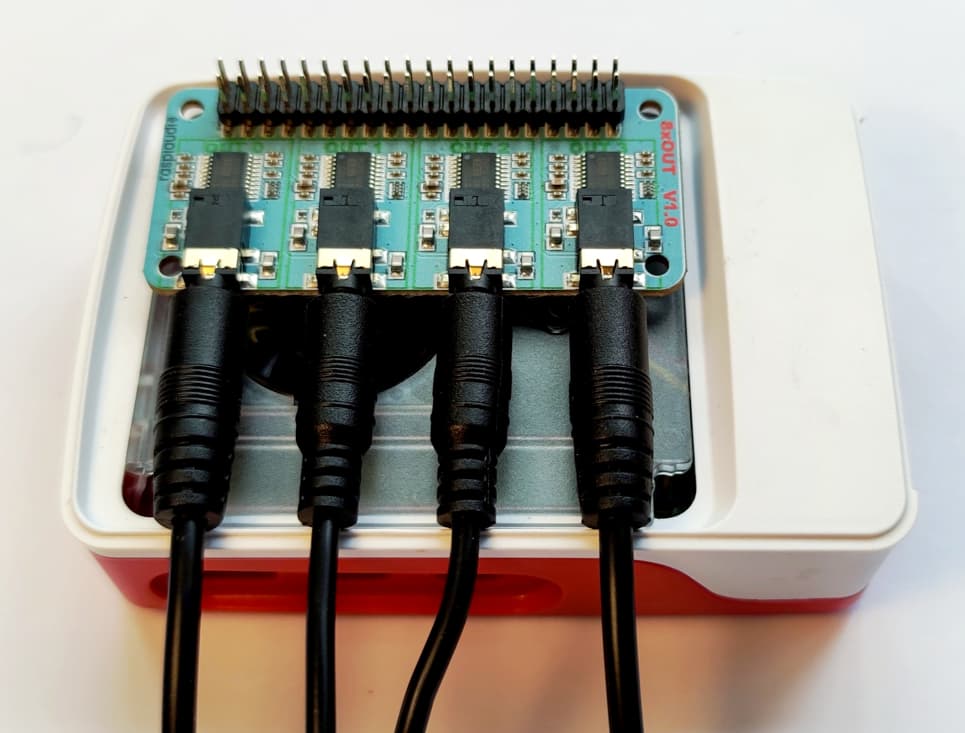
Then assemble it in the official case ![]()
Automatic installation (tested on Raspberry Pi OS)
-
Update to the latest Pi 5 firmware:
sudo rpi-update -
List your audio devices:
aplay -l
You should see something like:
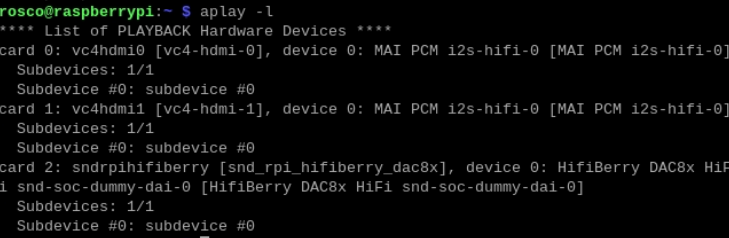
In this example the DAC is on card 2, device 0.
-
Play a simple 8-channel test:
speaker-test -D plughw:2,0 -l5 -c8 -t wavYou should hear audio on each channel in sequence.
For applications that only support stereo, you can create four virtual stereo devices and assign each app to a different virtual card.
Quick start guide for the 8xIN 8xOUT
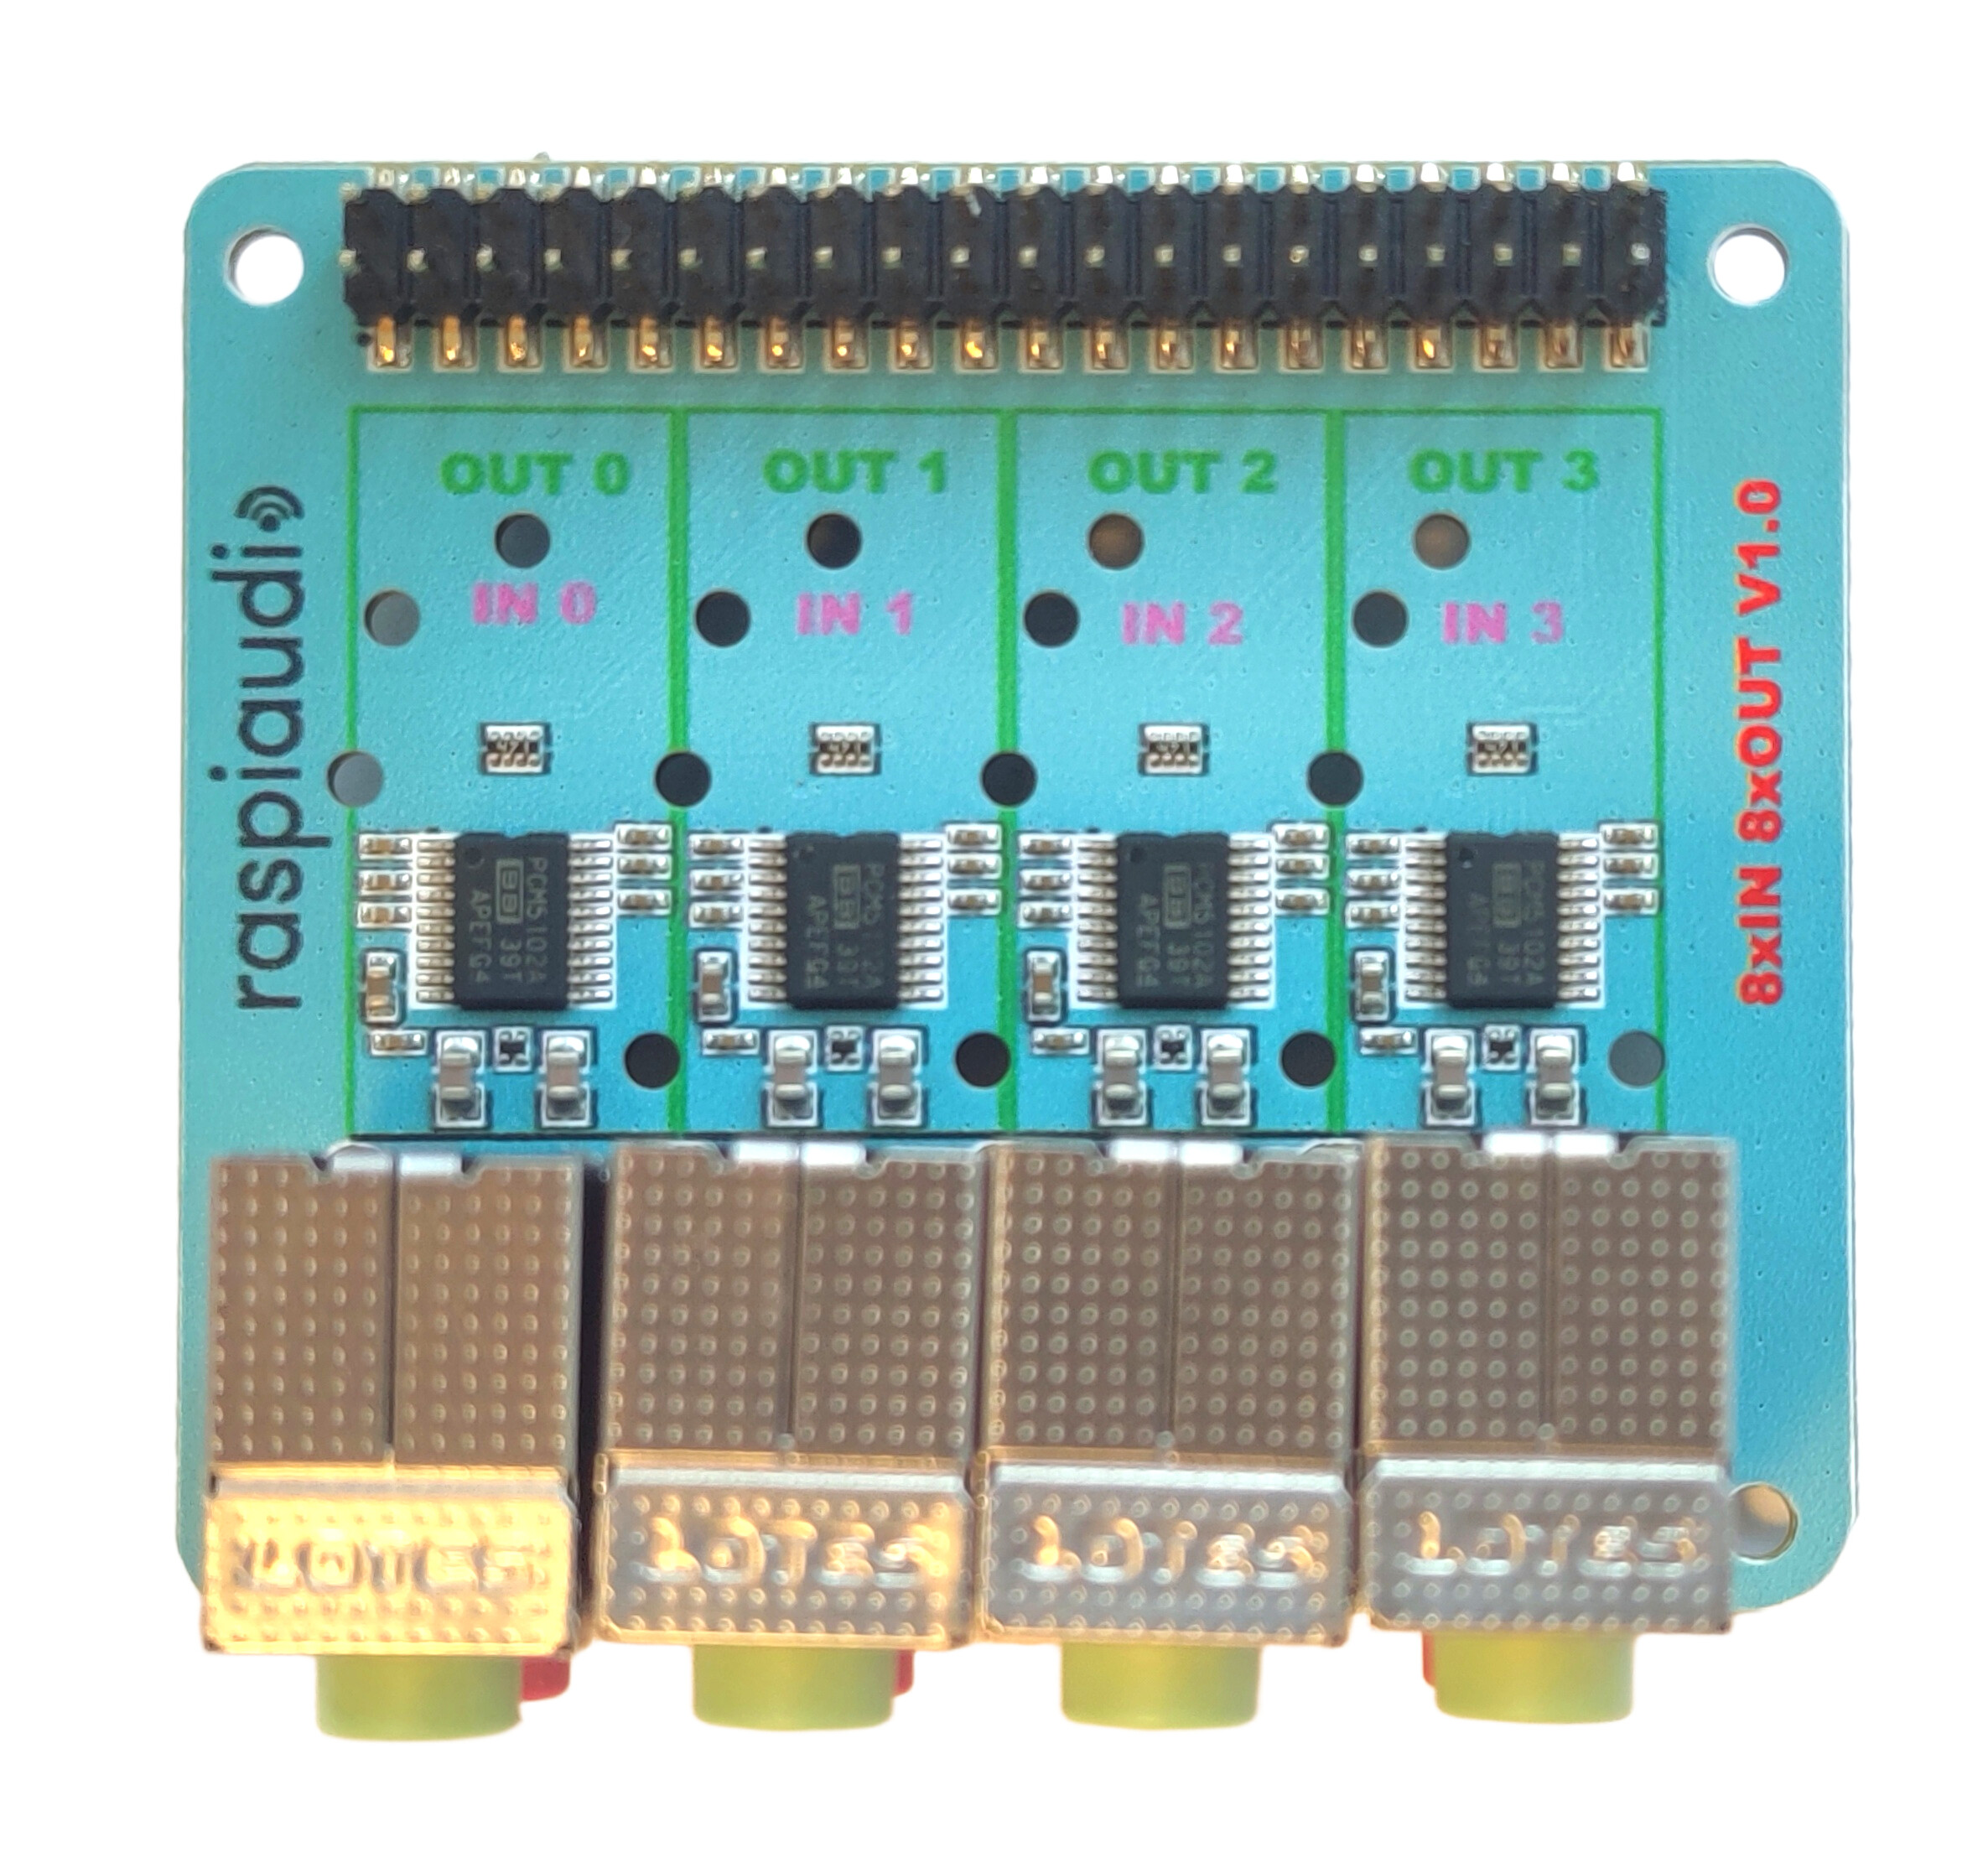
First, a quick hardware note:
- The green jacks are inputs.
- The red jacks are outputs.
Driver information
The output section is identical to the 8xOUT board — it uses the exact same driver.
To check if your device is properly detected, run:
arecord -l
You should see something like this:

![]() If you don’t see any recording device:
If you don’t see any recording device:
Your Raspberry Pi OS might be outdated. In that case, run a system update.
Recording your 8 channels
In the above example, the ADC appears as card 2, device 0.
You can record the 8 input channels with:
arecord -D plughw:2,0 -c8 -f S32_LE -r 48000 test.wav
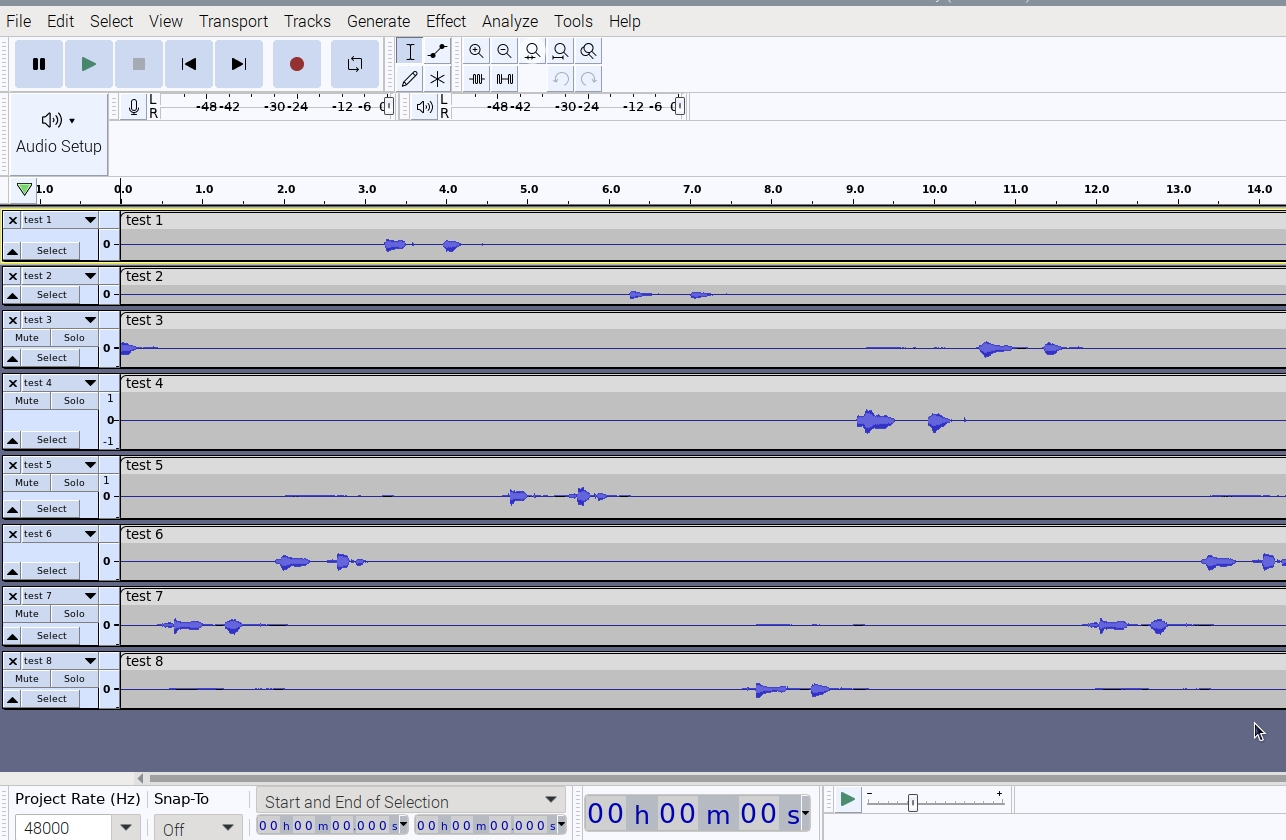
Visualizing the recording
You can easily open the recorded file with Audacity:
sudo apt-get install audacity
audacity test.wav
You should see your 8 audio tracks displayed:
Quick loopback test
You can verify everything works by physically connecting the outputs back to the inputs like this:

Then, run a simple playback and record test:
speaker-test -D plughw:2,0 -l5 -c8 -t wav &
arecord -D plughw:2,0 -c8 -f S32_LE -r 48000 test.wav
![]() That’s it — you’re now recording 8 channels simultaneously!
That’s it — you’re now recording 8 channels simultaneously!
Manual installation
- Update to the latest Pi 5 firmware:
sudo apt-get install rpi-update
sudo rpi-update
-
Edit /boot/firmware/config.txt:
sudo nano /boot/firmware/config.txt -
Remove or comment out the built-in audio line:
dtparam=audio=on -
Add the HiFiBerry DAC 8X overlay at the end:
dtoverlay=hifiberry-dac8x -
Reboot:
sudo reboot
Pinout 8xIN OUT
| Schematic Pin | Shield Signal Label | Actual Pi Physical Pin | Pi Standard GPIO / Function |
|---|---|---|---|
| 1 | +5V0 | 2 | 5V Power |
| 2 | +3V3 | 1 | 3.3V Power |
| 3 | +5V0 | 4 | 5V Power |
| 11 | BCK | 12 | GPIO 18 (PCM_CLK) |
| 12 | DIN4 | 11 | GPIO 17 |
| 13 | GND | 14 | Ground |
| 14 | DOUT2 | 13 | GPIO 27 |
| 15 | DIN2 | 16 | GPIO 23 |
| 17 | DOUT3 | 18 | GPIO 24 |
| 19 | GND | 20 | Ground |
| 21 | DIN3 | 22 | GPIO 25 |
| 26 | GND | 25 | Ground |
| 27 | EECLK | 28 | ID_SC (I2C0 Clock for HAT EEPROM) |
| 28 | EEDATA | 27 | ID_SD (I2C0 Data for HAT EEPROM) |
| 29 | GND | 30 | Ground |
| 33 | GND | 34 | Ground |
| 36 | LRCK | 35 | GPIO 19 (PCM_FS) |
| 37 | DOUT1 | 38 | GPIO 20 (PCM_DIN) |
| 38 | DOUT4 | 37 | GPIO 26 |
| 39 | DIN1 | 40 | GPIO 21 (PCM_DOUT) |
| 40 | GND | 39 | Ground |
Pinout 8xOUT
| Schematic Pin | Shield Signal Label | Actual Pi Physical Pin | Pi Standard GPIO / Function |
|---|---|---|---|
| 1 | +5V0 | 2 | 5V Power |
| 2 | +3V3 | 1 | 3.3V Power |
| 3 | +5V0 | 4 | 5V Power |
| 11 | BCK | 12 | GPIO 18 (PCM_CLK) |
| 12 | DIN4 | 11 | GPIO 17 |
| 13 | GND | 14 | Ground |
| 15 | DIN2 | 16 | GPIO 23 |
| 19 | GND | 20 | Ground |
| 21 | DIN3 | 22 | GPIO 25 |
| 26 | GND | 25 | Ground |
| 27 | EECLK | 28 | ID_SC (I2C0 Clock for HAT EEPROM) |
| 28 | EEDATA | 27 | ID_SD (I2C0 Data for HAT EEPROM) |
| 29 | GND | 30 | Ground |
| 33 | GND | 34 | Ground |
| 36 | LRCK | 35 | GPIO 19 (PCM_FS) |
| 39 | DIN1 | 40 | GPIO 21 (PCM_DOUT) |
| 40 | GND | 39 | Ground |