Battery upgrade for the MuseLuxe

Note that all LUXE shipped after JULY 2022 now have a better 2000mAh battery, it is you to descide if it worth it now to upgrade or not

In this tutorial we will see how to upgrade your MuseLuxe Speaker with a better rechargeable battery to extend the playing time or just to change your battery to extend its life. As nowaday reparability is an important aspect in product life, don’t put it in the trash when you can repair it!

Indeed the rechargeable battery included in the Luxe is not the best, as it is a budget battery the rated capacity is only rated 1200mAh (the deep cycle test I did get 1500mAh), to give you an idea today the most advanced 18650 battery can achieve 3500mAh so by changing the battery you could more than double the playing time.

Just as a matter of comparaison original battery vs 3500mah Battery:

  • Playing time goes from 4h to 9h+
  • Standby time goes from 14h to 60h+

Disclaimer : Unless explicitly mentioned by Raspiaudio this operation will void you existing warranty, Raspiaudio on can’t be hold responsible for any direct or indirect injuries resulting in this product modification. Batteries stores energy and could be dangerous if manipulated incorrectly.

Tools :

  • long flat screwdriver
  • a non sharp metal blade this is usually a tool that you could find in kit to disassemble phones. image
    *A pair of pointy twisors
    image

Part list :

  • A 3.7v rechargeable 18650 Lithium battery I recommend to use one with a protection circuit such as the one linked here I have based my test on (this is not an affiliate link) just a note on the battery, this is very hard to find a trustable battery source especially when you buy from China. As there is such a big price difference the battery capacity that is indicated on the battery is not always true. A trustable source in Europe is Nkon

  • Electrical tape

  • Double sided tape

Step 1 : Open the speaker
Here is a short video : Note that the twisors are used to pass through the holes of the mesh and pull (this might damage your twisors tip).

the inide should look like this :

Step 2 : The blue built-in battery is glued in the case, so it is easier to put the new battery above as there’s enough room. But if you wish to remove the blue battery you will need to use a strong solvent such as Acetone

Step 3 : Disconnect the existing blue battery by cutting the red and black wire, be careful not to shortcut the battery. Remove the insulation of the cable on 1cm, and connect respectively the red and black cables on the new battery. You could solder cable together or just twist them together and use strong electrical tape for isolation.

Do not try to connect 2 batteries in parallel that are not exactly the same model

THIS METHOD IS OBSOLETE ALL UNITS AS IT AS BEEN FIXED ON ALL UNIT SOLD AFTER APRIL 2022

Here is the tutorial to improve the standby time of the Luxe. If you wish to extend the standby time to about 3.5 days for a consumption of about 14mA while off with the stock battery. And 10 days if you also change the battery for a good 3500mAh model.

Indeed the stock standy performances of the Luxe are not so good with about 14h to 24h (with stock battery). The main root cause has been found :

image
389×524 2.98 KB

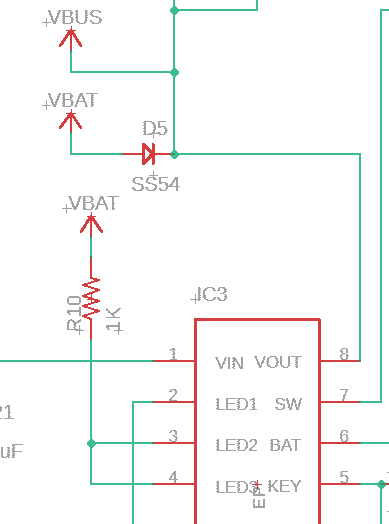
When on battery the Vusb is still fed by the Vout of the Battery management IC when it should not, causing some extra battery consumption.

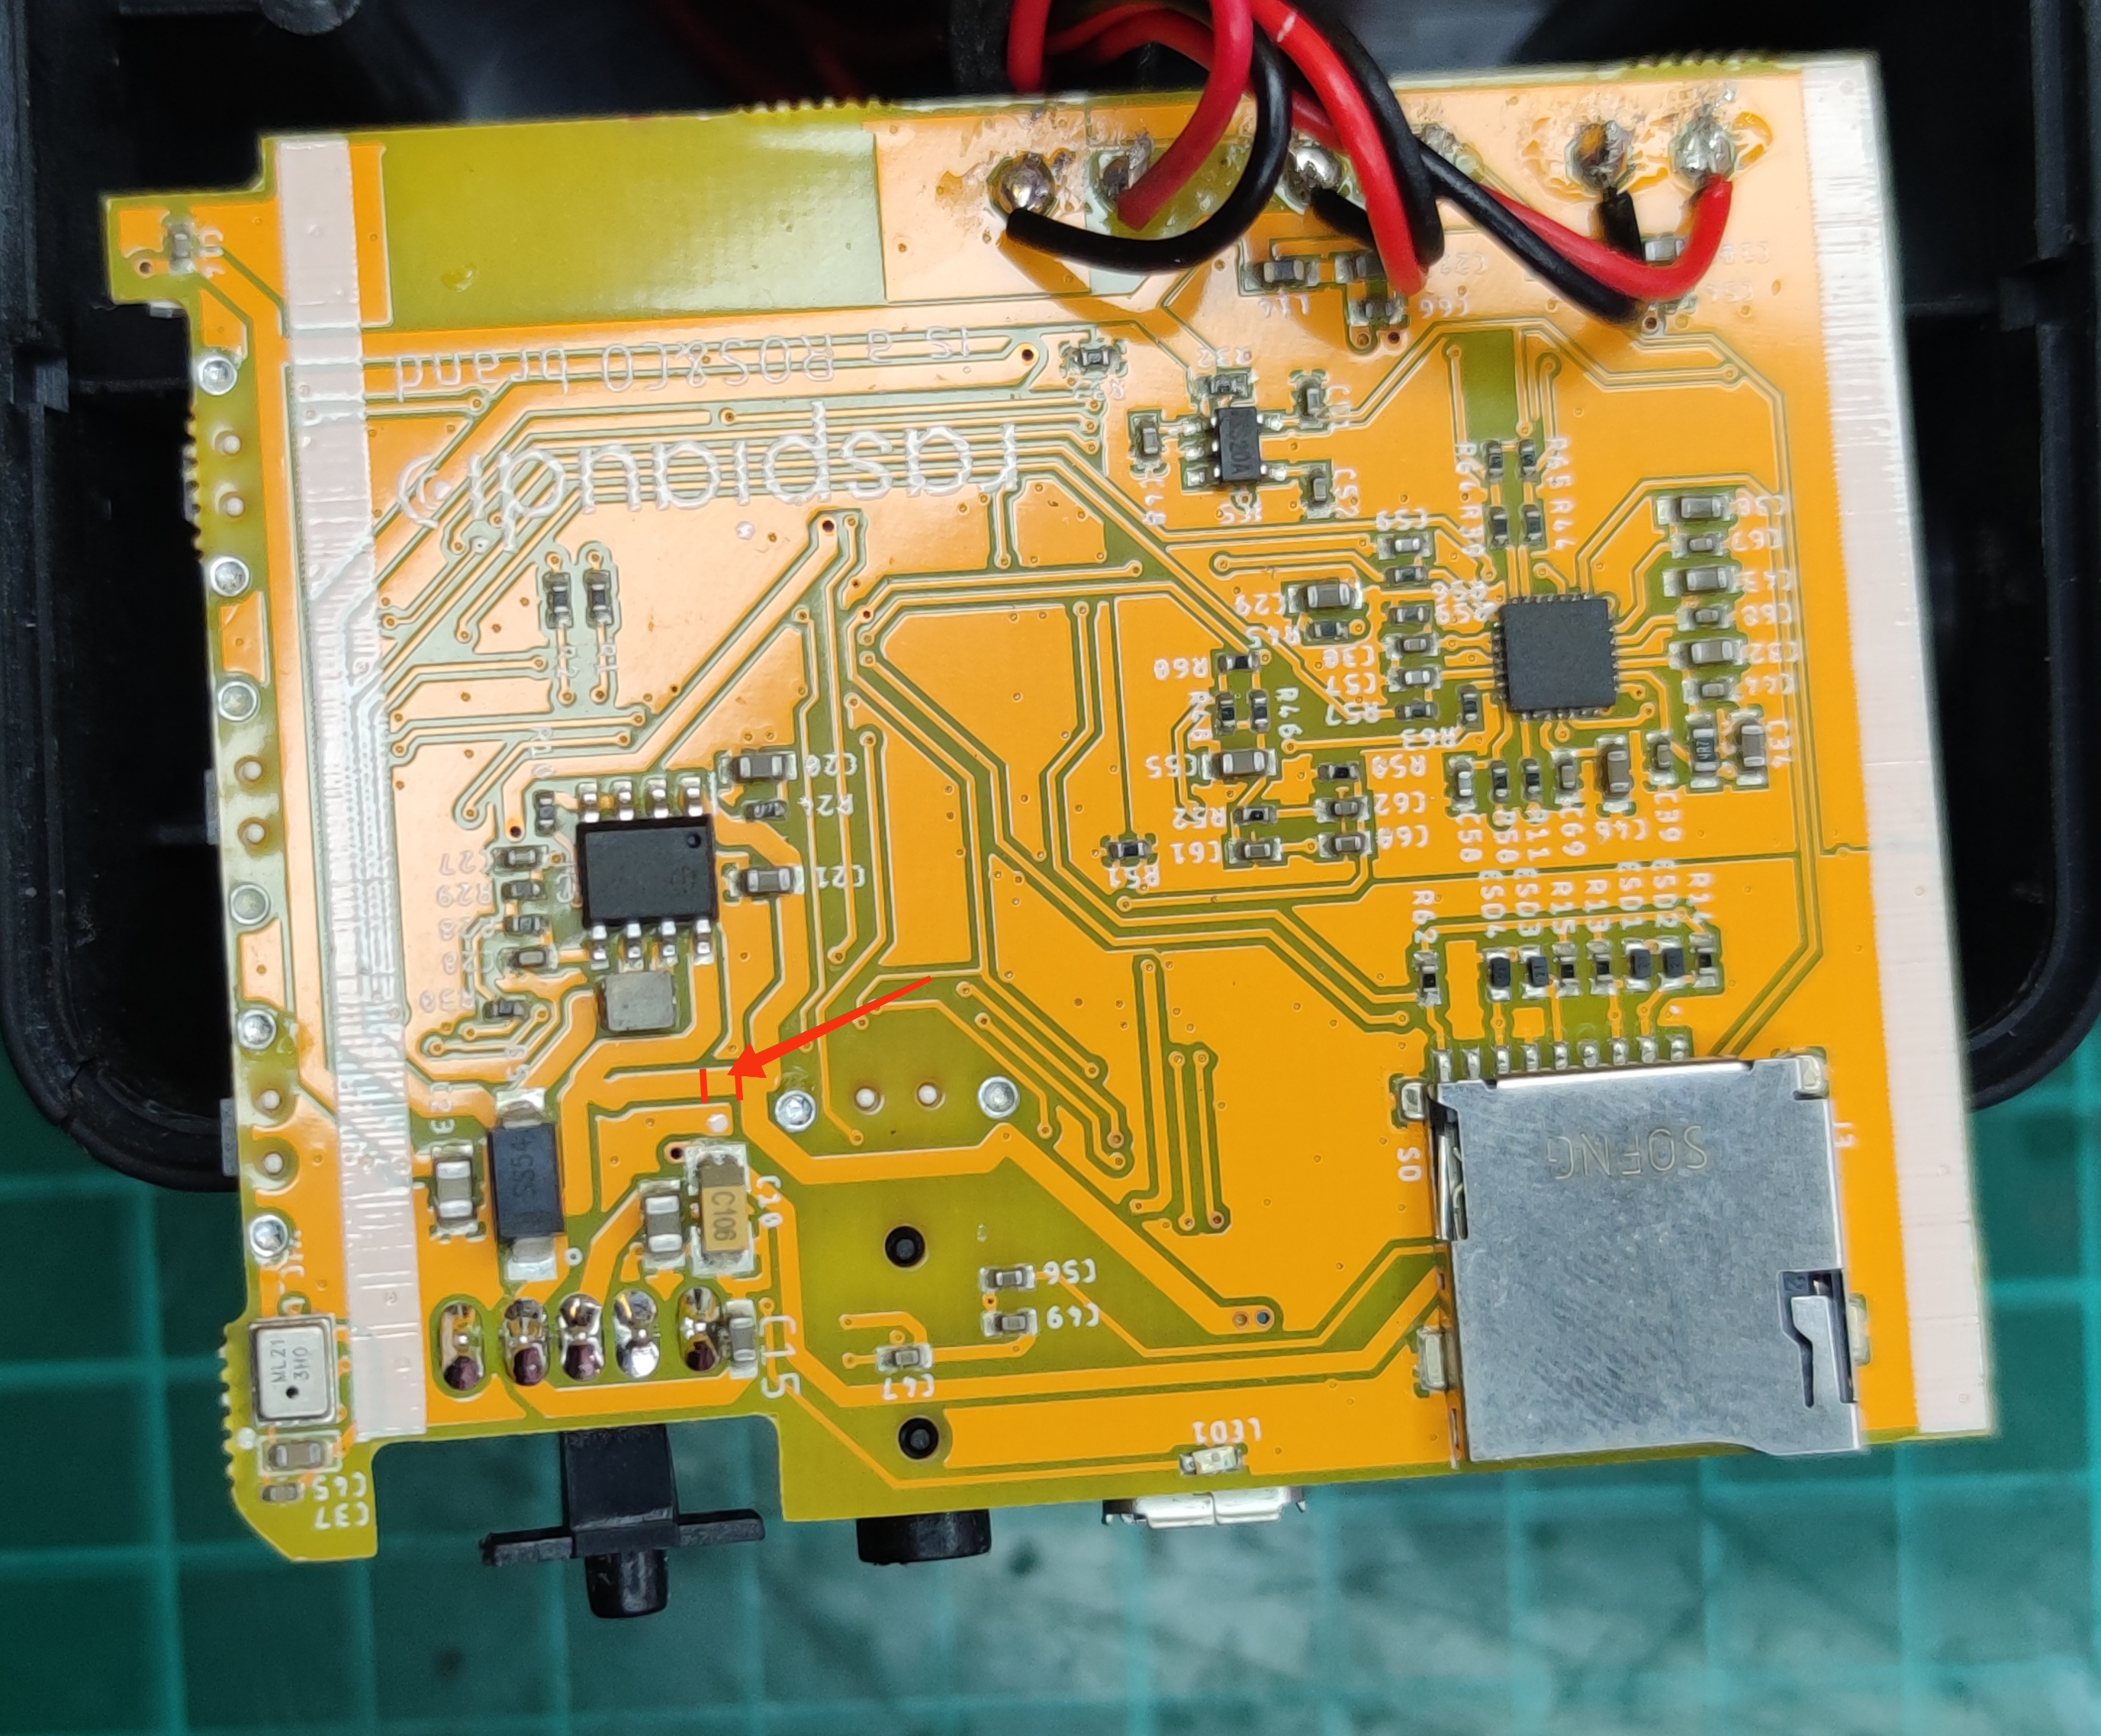
If you wish to extend the standby time this implies to cut a track on the PCB. First open the casing (see previous post).

Then look just above the ON/OFF switch for C10, above C10 there is a track this track need to be cut (look at the red arrow) :

Here is a video tutorial :

Thanks for posting these instructions.

Since you show a small part of the schematic around the charger IC, I have a question about this schematic. What is the function of R10? Maybe the current drain of 14mA from the battery can be reduced by increasing the value of this resistor, or by removing this resistor? If pins LED2 and LED3 of the battery charger are NMOS open drain outputs, and one of these pins is pulled low during standby, than the current drawn from the battery could be reduced with 3.5 to 4mA by removing R10.

Hi CJS, No R10 is not related with the drain issue, this is a way to indicate to the charging IC that only one led status is used by putting the other optional led in pull up.
The 14mA has been already identified this is coming from a bug in this batch of charging IC. On my prototype the same IC is consuming only 150 Micro amp. To confirm a crossed test was also done by swapping the prototype board IC on a stock Muse Luxe and I find again the 150 micro Amp.

Thanks Olivier/Raspiaudio for this information!

Apologies for waking this thread again. What kind of “standby” time (that is, power switch off) should a unit ordered after April expect? I ordered mine on December 18 from Amazon, US.

I would say 3-4 days