This is the tutorial for the ESP MUSE LUXE to load the Basic bluetooth speaker sketch. This is the default Sketch that is loaded on the speaker when you received it.
Features of this Squetch:
- Bluetooth AD2P audio connectivity
- MP3 read on the SD card
- Amplification of what is sent to the AUX IN jack cable
- Battery neopixel charge indicator
- Mute button, volume UP, Down
NOTE THAT THE USB CABLE THAT COME WITH THE SPEAKER IS A CHARGING CABLE ONLY to upload data you will need a micro usb data cable
You can just load the pre-compiled firmware OR recompile everything
OPTION 1 : Load precompiled firmware
Download the pre-compiled firmware
Now it’s time to download the pre-compiled firmware :
It must be loaded using the ESP32 flash downloading tool :
Unzip it and execute
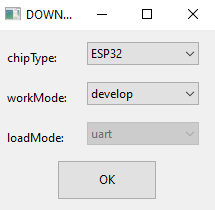
Choose Developer Mode / ESP32 :
Select the path of the previously downloaded .bin file and set the loading address to “0x0” :

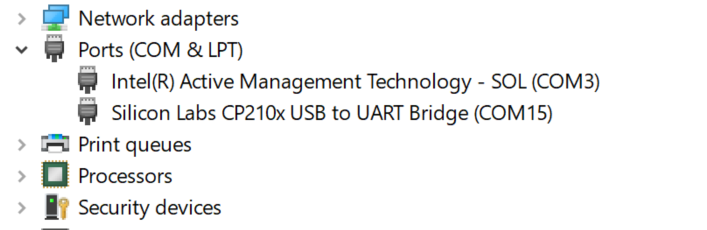
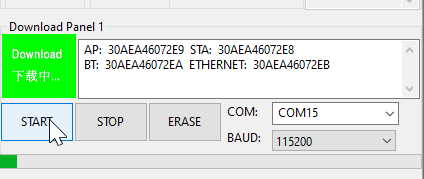
Connect the RASPIAUDIO MUSE PROTO via USB at the bottom select the right com port used by the connected board:

This com port number could change so if you are not sure of the com port go in windows 10 go to Device Manager and in the port section look for the number used by Silicon Lab…
Check that the switchon the back is ON
Click on START, it should now take 3mn to load:
reboot and you will see the “muse” wifi acces point to connect to. See below for more details.
OPTION 2 : Compile the code
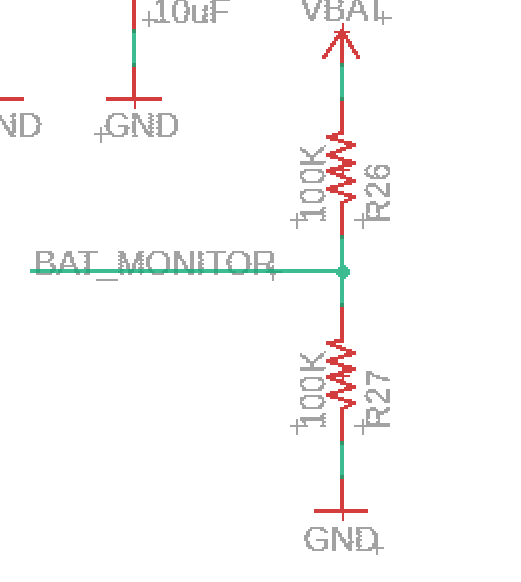
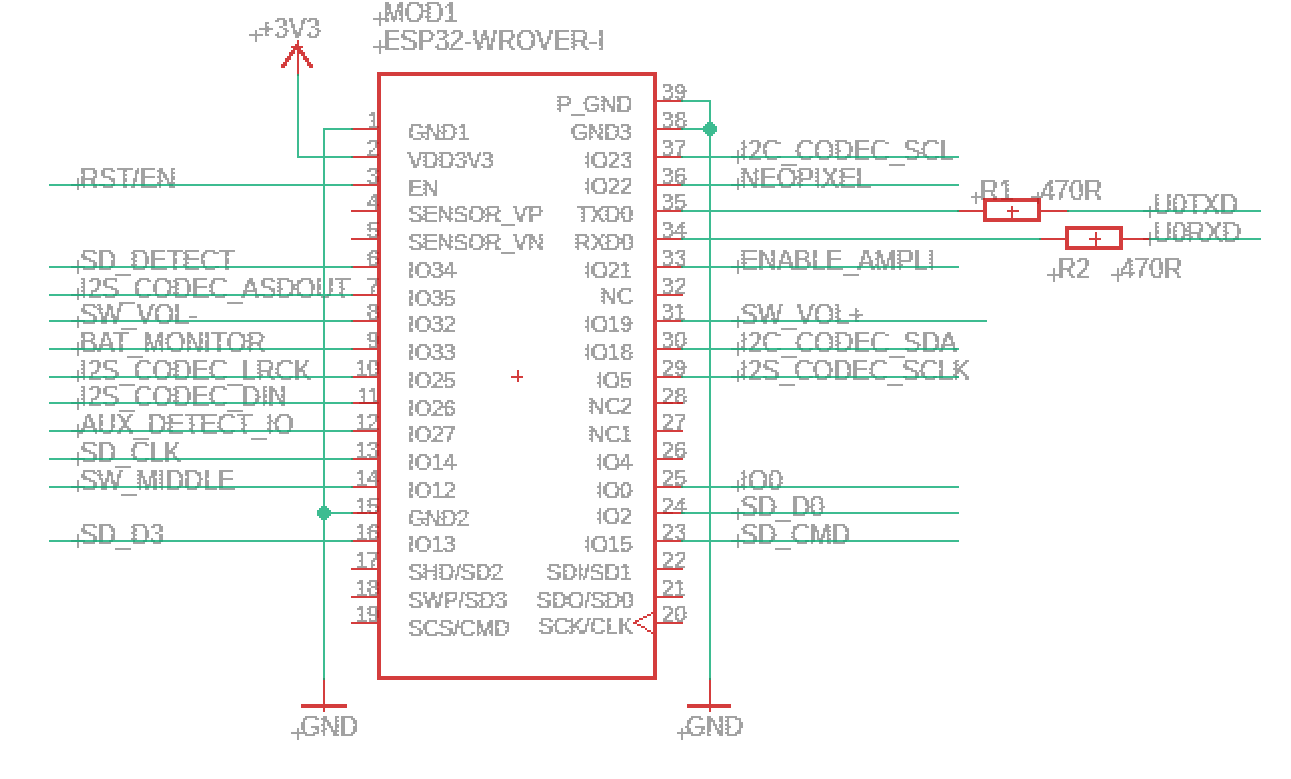
Here is the general input /output of the device (TODO presentation to be improved):
The goal of this tutorial is to guide you for the compilation of the arduino code and show you how to customize a few things.
Step 1:
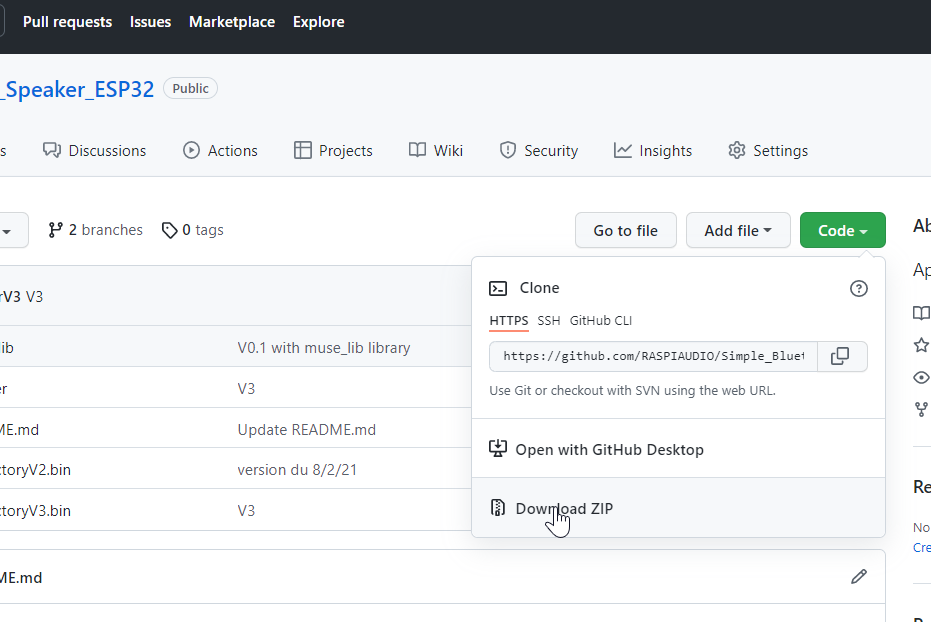
Download the zip here:
You will need to install the Arduino IDE
2. Copy then library
In the unziped archive copy the directory muse_lib in your arduino library folder, on windows this is in Documents\Arduino\libraries , if you are on linux /Arduino/libraries
3. Install the ESP32 board in the Arduino IDE (skip this step if you already installed it)
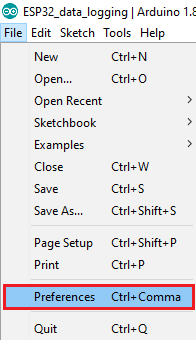
A. In your Arduino IDE, go to File > Preferences
B. Enter https://dl.espressif.com/dl/package_esp32_index.json into the “Additional Board Manager URLs” field as shown in the figure below. Then, click the “OK” button:
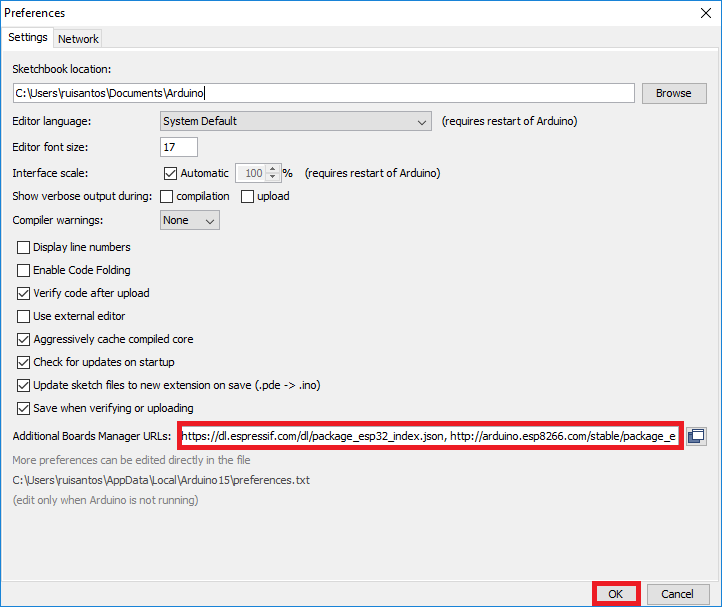
Note: if you already have the ESP8266 boards URL, you can separate the URLs with a comma as follows:
https://dl.espressif.com/dl/package_esp32_index.json, http://arduino.esp8266.com/stable/package_esp8266com_index.json
C. Open the Boards Manager. Go to Tools > Board > Boards Manager…

D. Search for ESP32 and press install button for the “ ESP32 by Espressif Systems “:
Note that for now the code ONLY COMPILES WITH VERSION 1.0.5 so select the right version. we will update that soon.

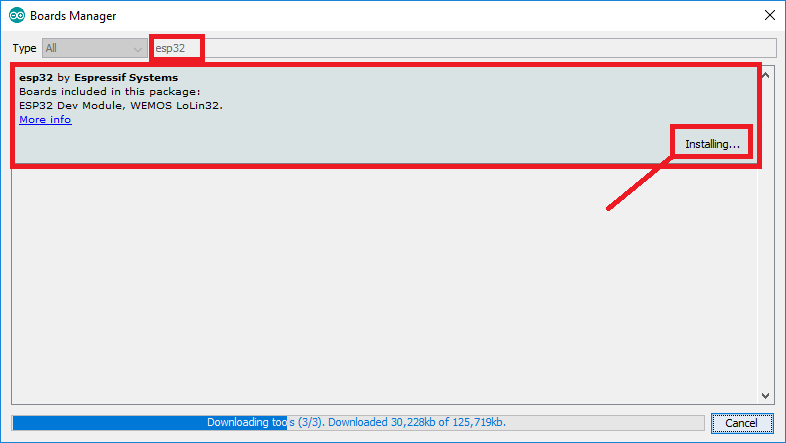
E. That’s it. It should be installed after a few seconds.

Complete instructions are here : https://randomnerdtutorials.com/installing-the-esp32-board-in-arduino-ide-windows-instructions/
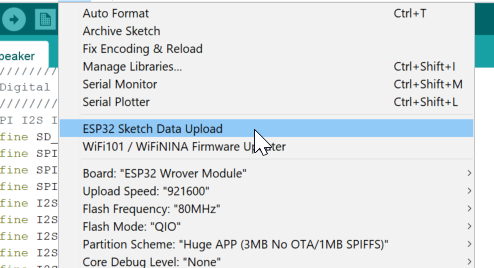
4. Target option in Arduino IDE Tools
- Select the following options in the arduino IDE:
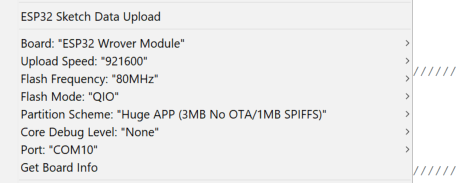
- Plug the Muse proto board and set the right com port in the menu showed above.
NOTE THAT THE USB CABLE THAT COME WITH THE SPEAKER IS A CHARGING CABLE ONLY to upload data you will need a micro usb data cable
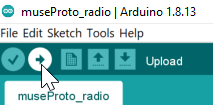
- Upload files such as wave file and config files to the ESP32 flash memory usuing the ESP32 Sketch Data Upload (see picture above), this is using Flash File System (SPIFFS) you can find more info here if you would like to go deeper on the subject (optional):
https://randomnerdtutorials.com/install-esp32-filesystem-uploader-arduino-ide/ - Upload the program to the ESP32 :
** Buttons **
Tho have the full experience you can add 3 buttons:
GPIO 12 // Pause/Play
GPIO 32 // Vol-
GPIO 19 // Vol+
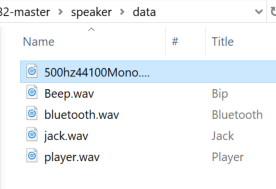
** Change the sounds playing “Bluetooth” “Player”…
wav files are located in the /data directory of the sketch
Optional
Your will notice the 500Hz… file this is used to test the speaker in the factory it is explained (but not usefull unless you want ot launch the self test pressing the 3 buttons simulatniously at startup)
you can record your own files, I use Goldwave GoldWave Download to de the editing/recording
Then upload it:
Here you can change the bluetooth device name :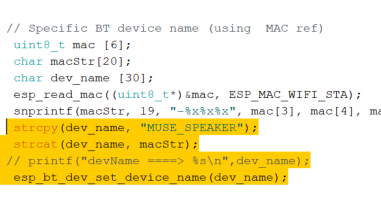


 received mine yesterday, delighted with the device (and easy integration into Home Assistant!). Thanks.