Modulox – Quick Start Guide
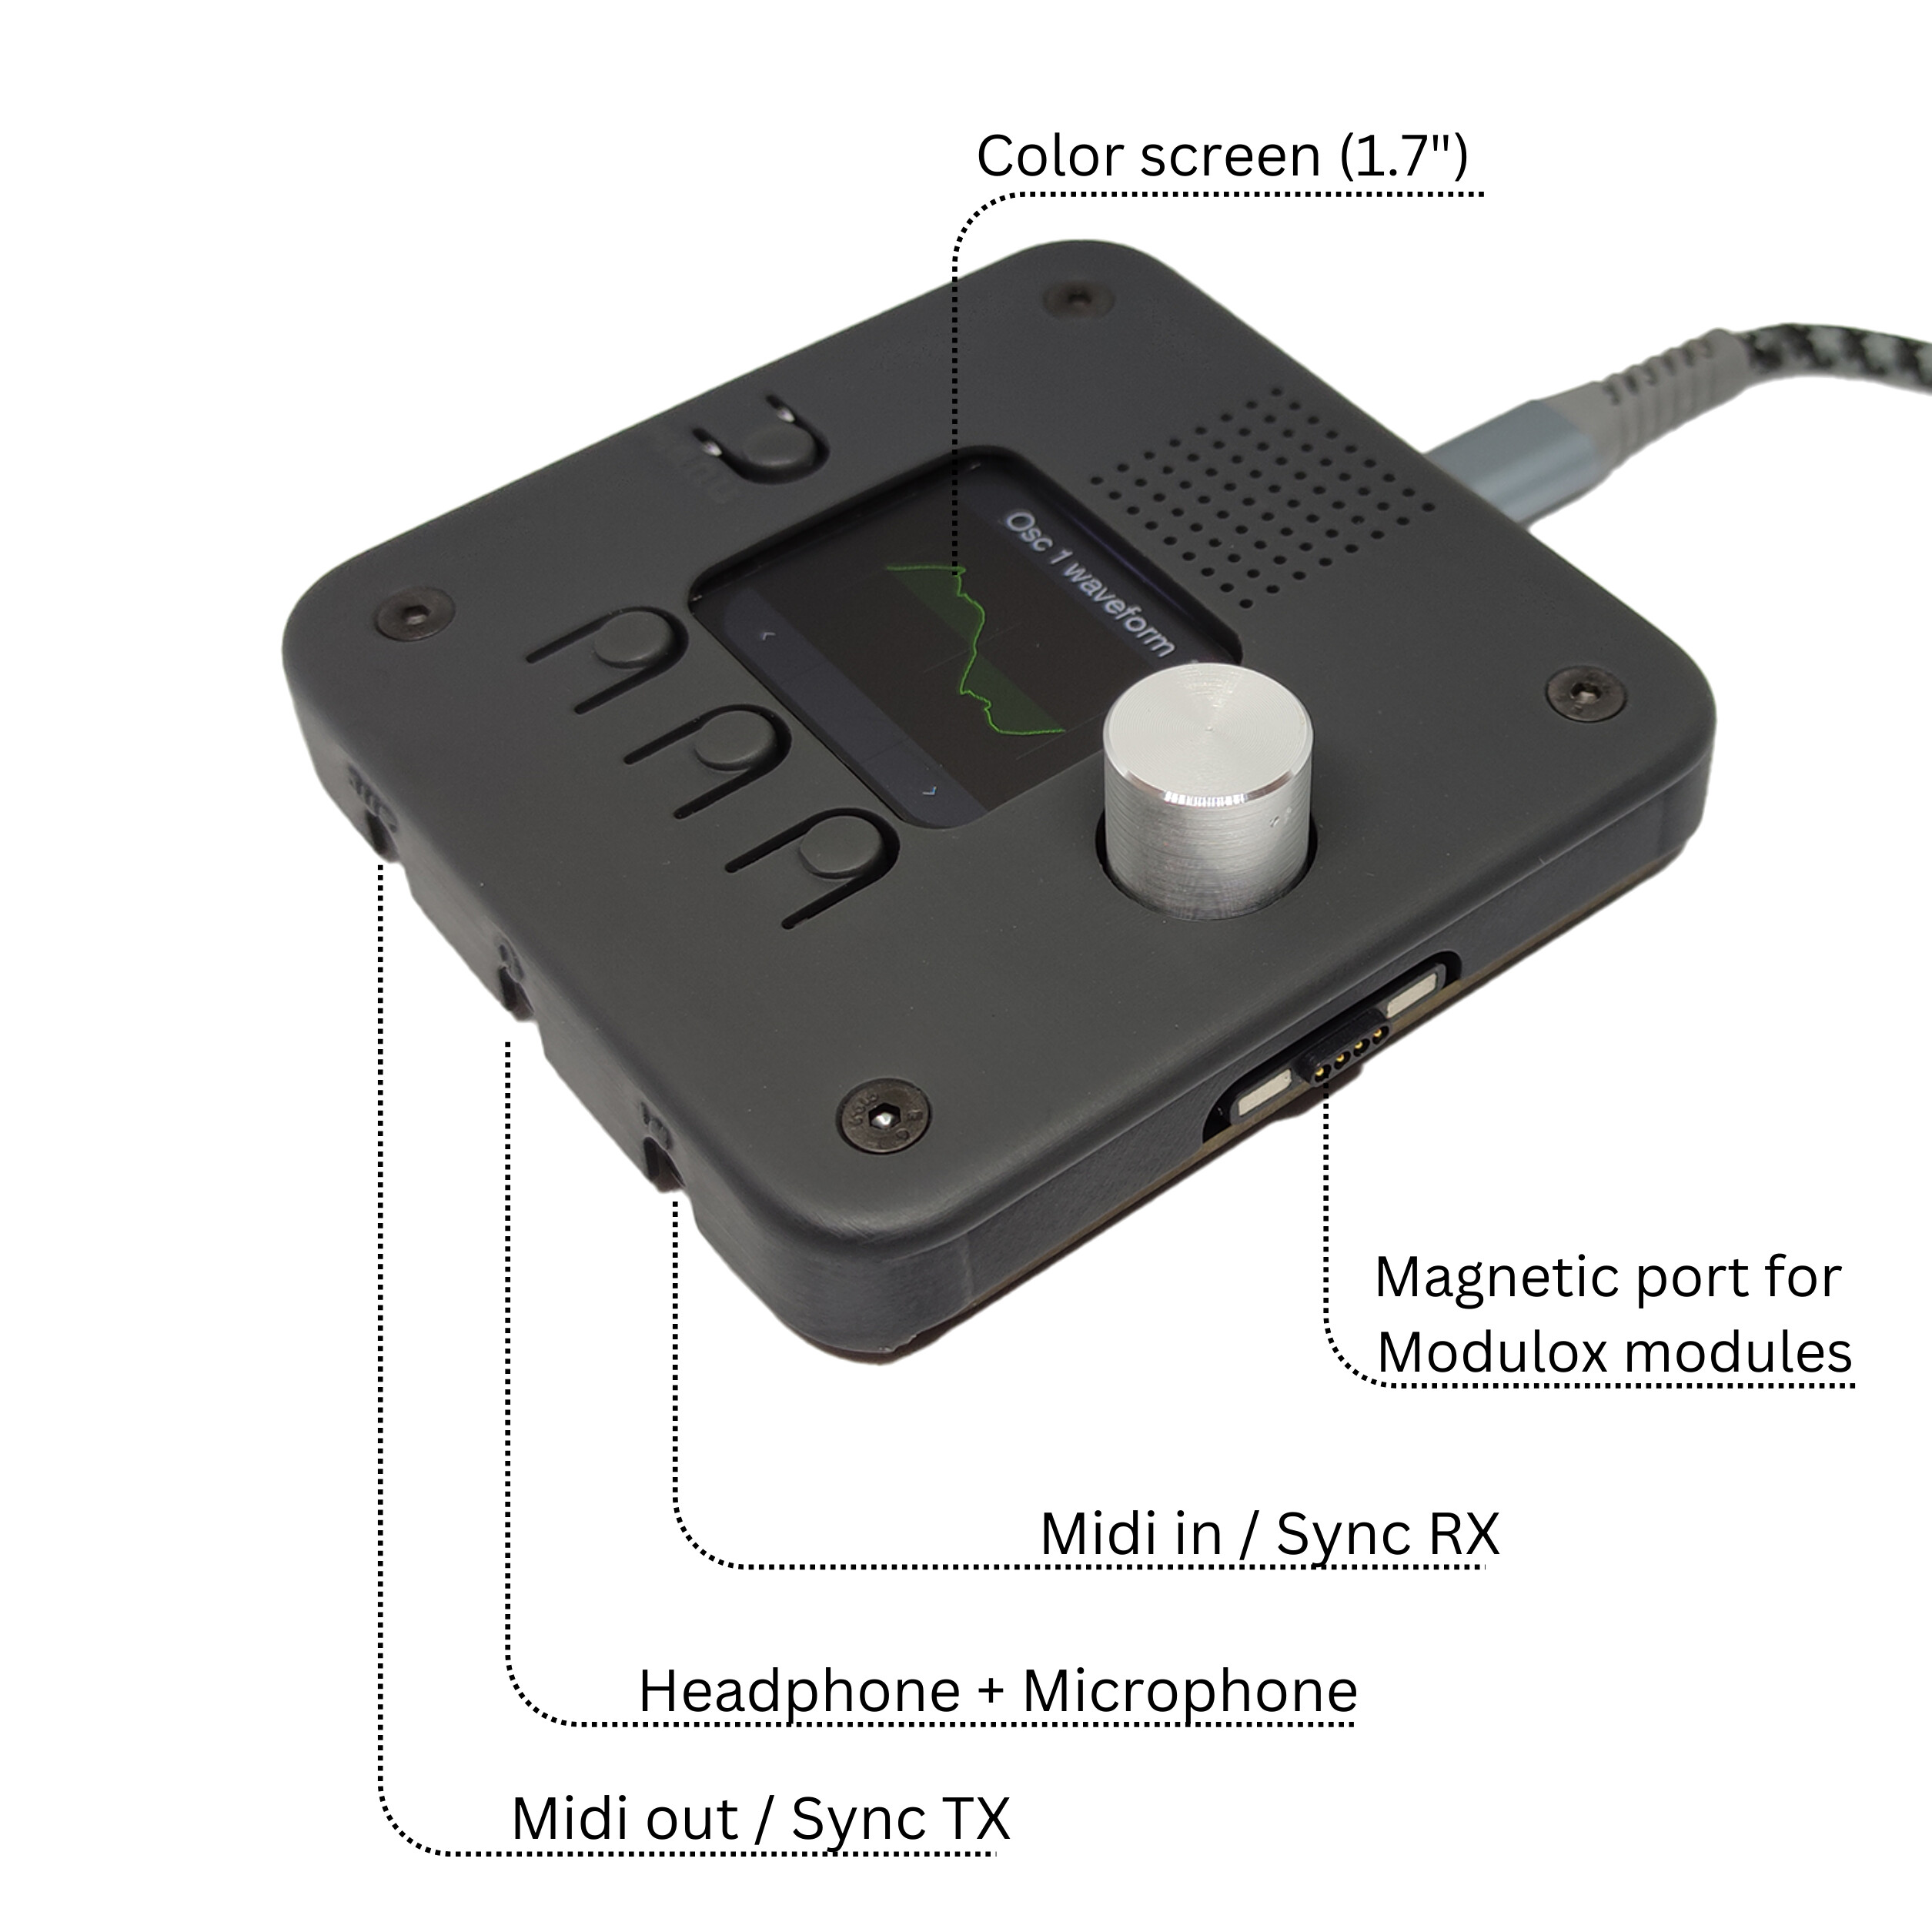
Modulox Brain
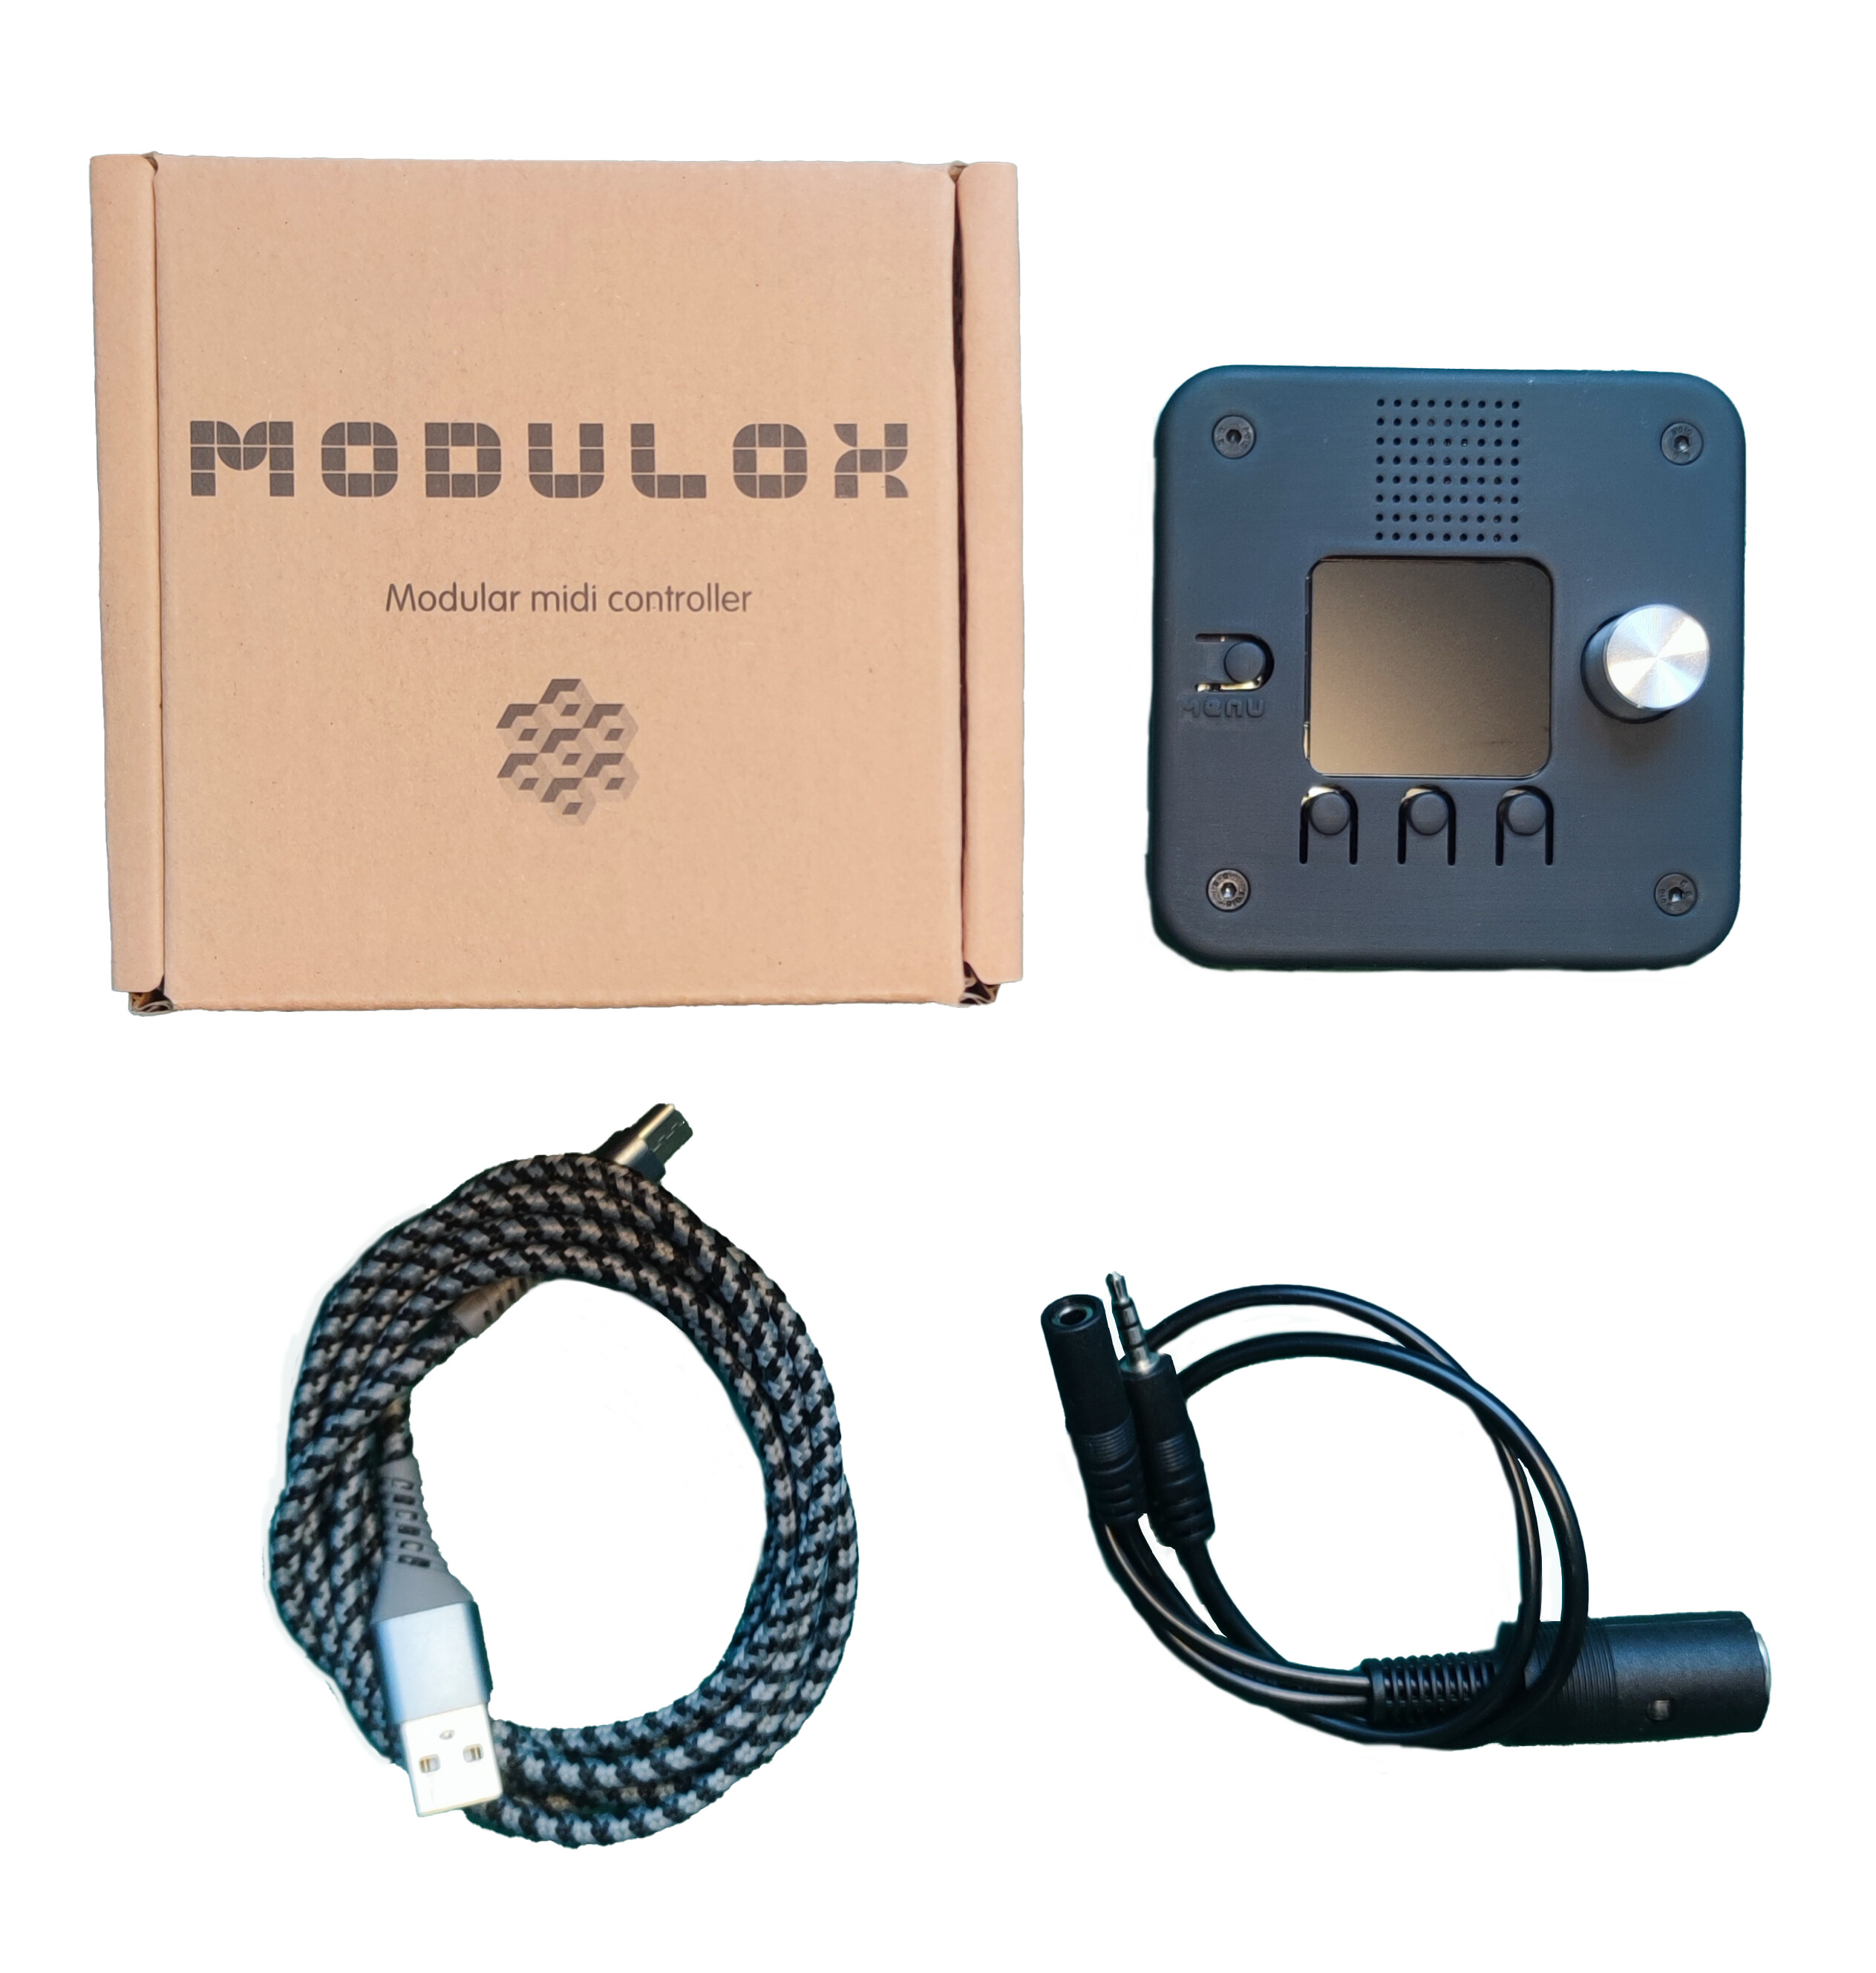
What’s in the Box?
- 3.5mm jack to MIDI DIN RX-TX + sync cable
- USB C cable
- Modulox Brain

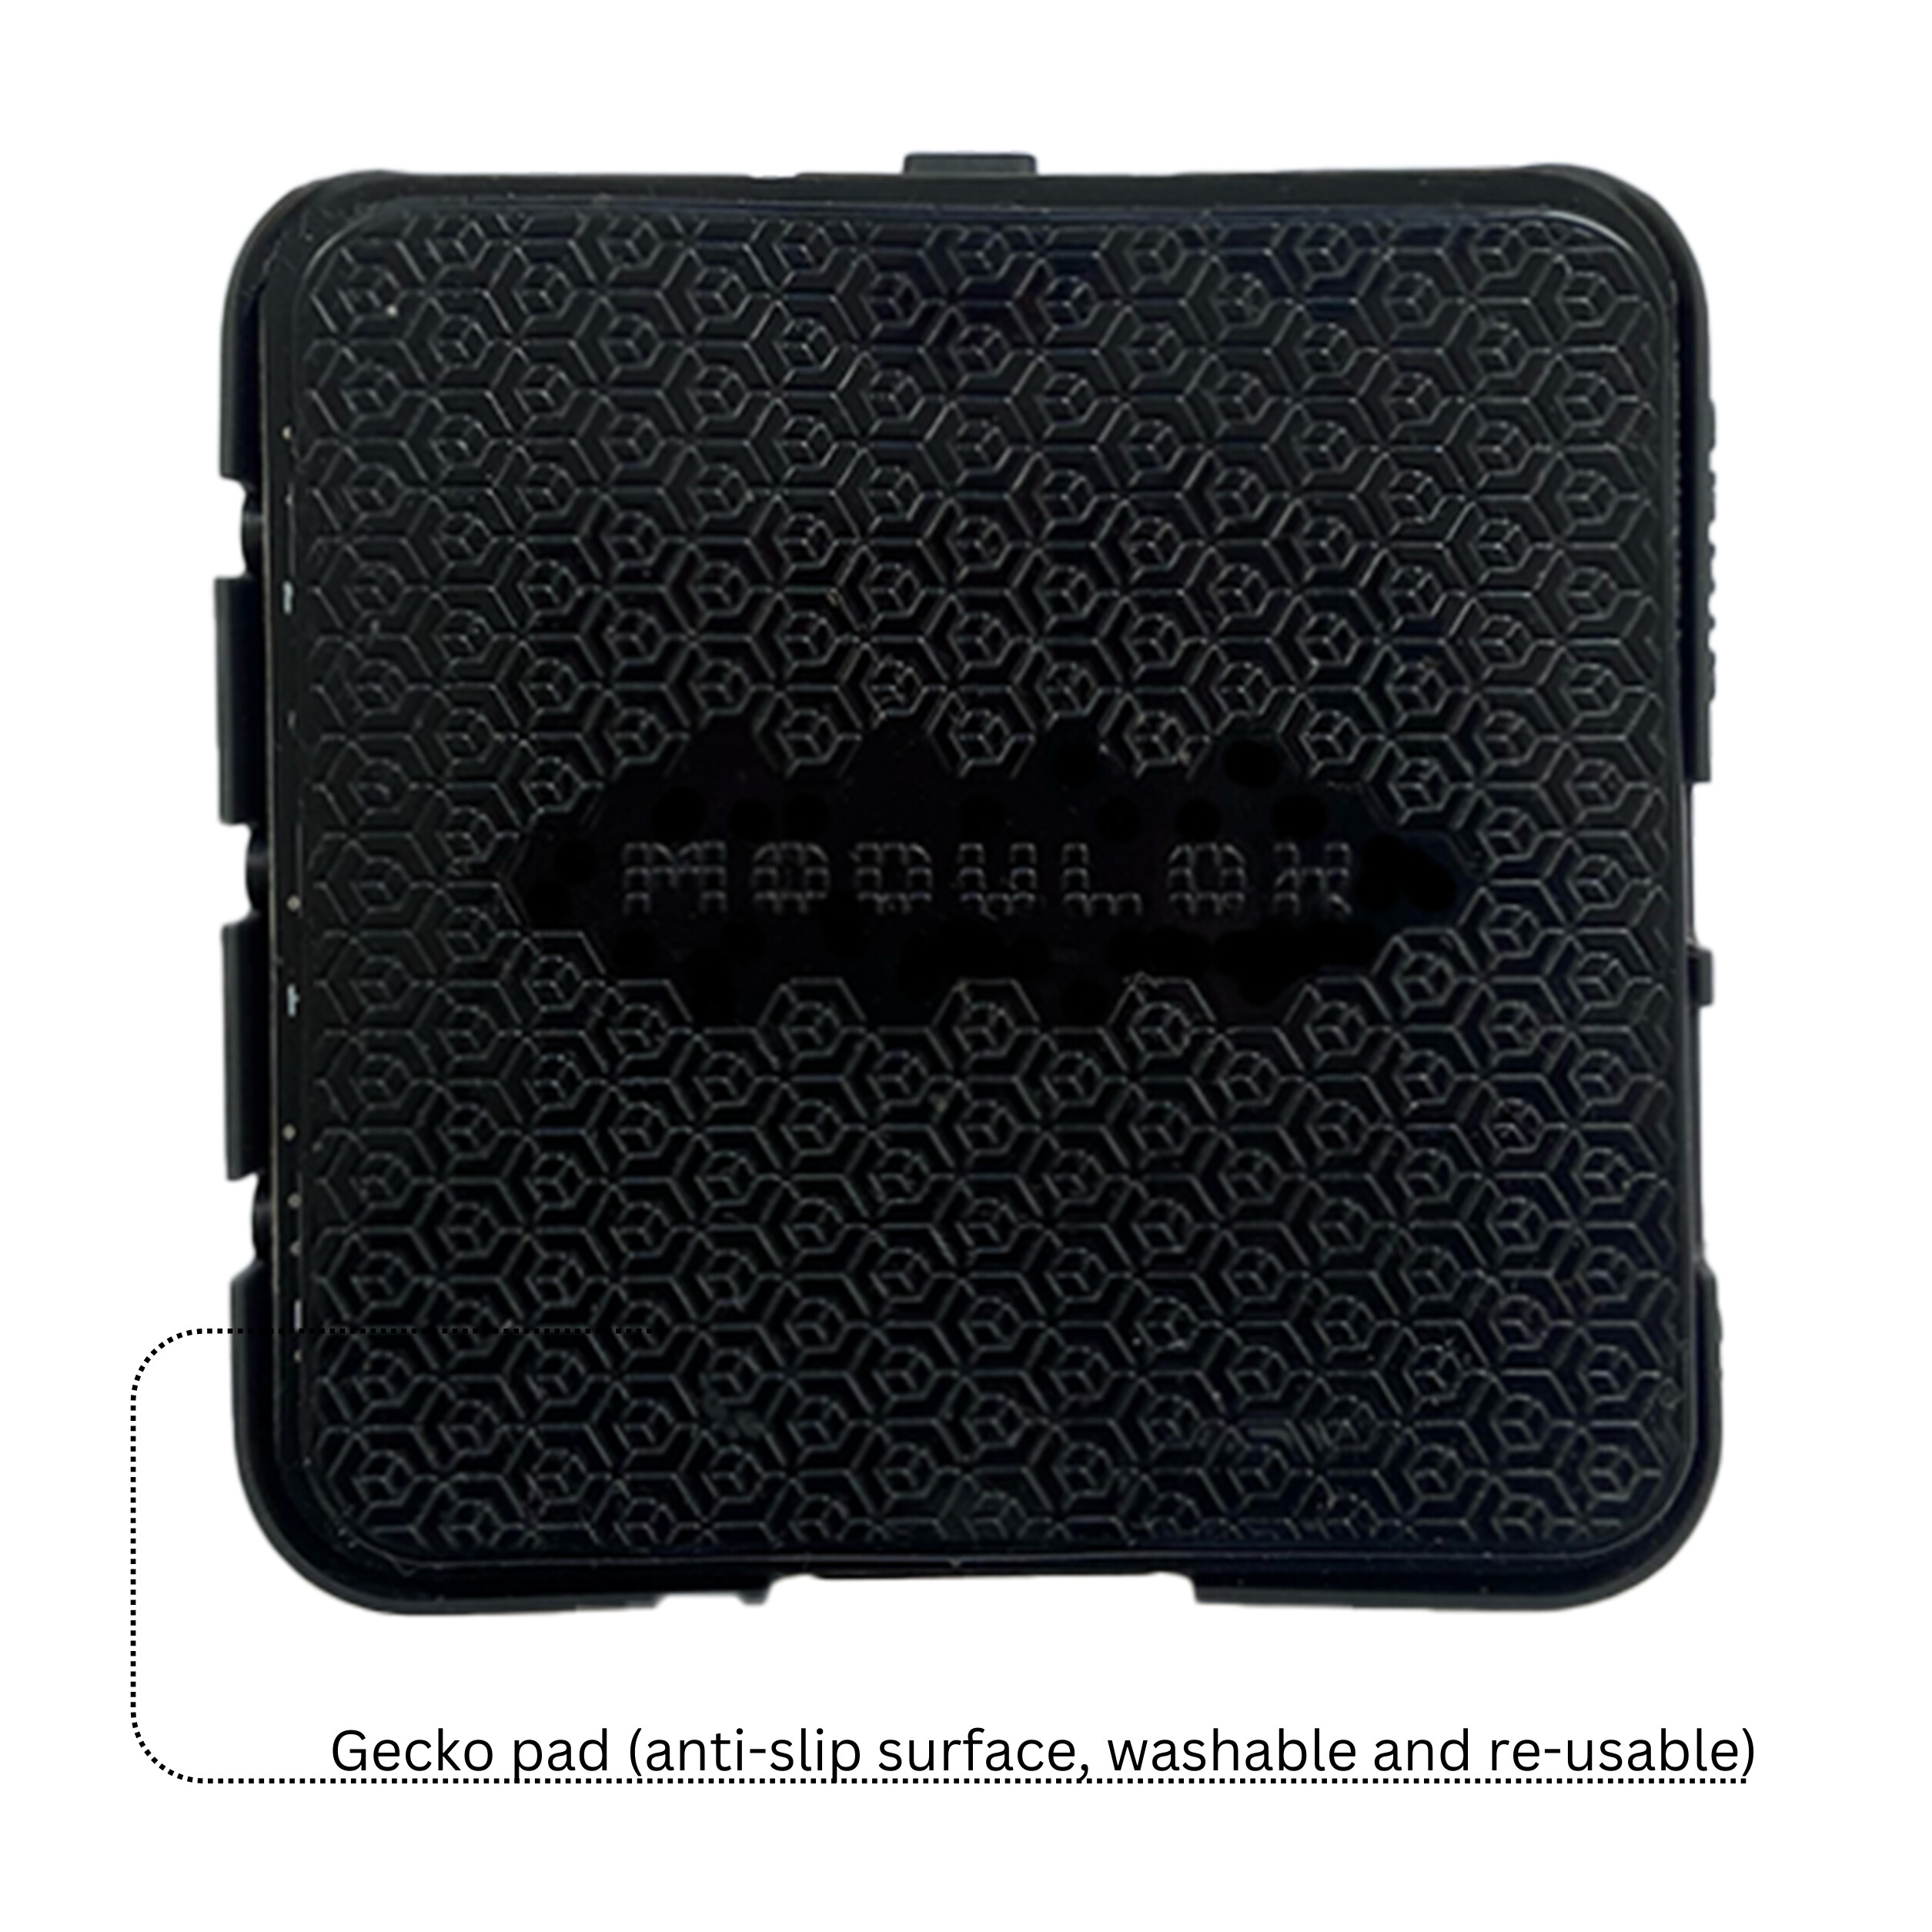
Cleaning the Modulox Sticky Base Pad
Use a wet sponge to clean the gecko pad. Allow it to dry for a few minutes and it will stick again!
Loading a New Machine on the Modulox Brain
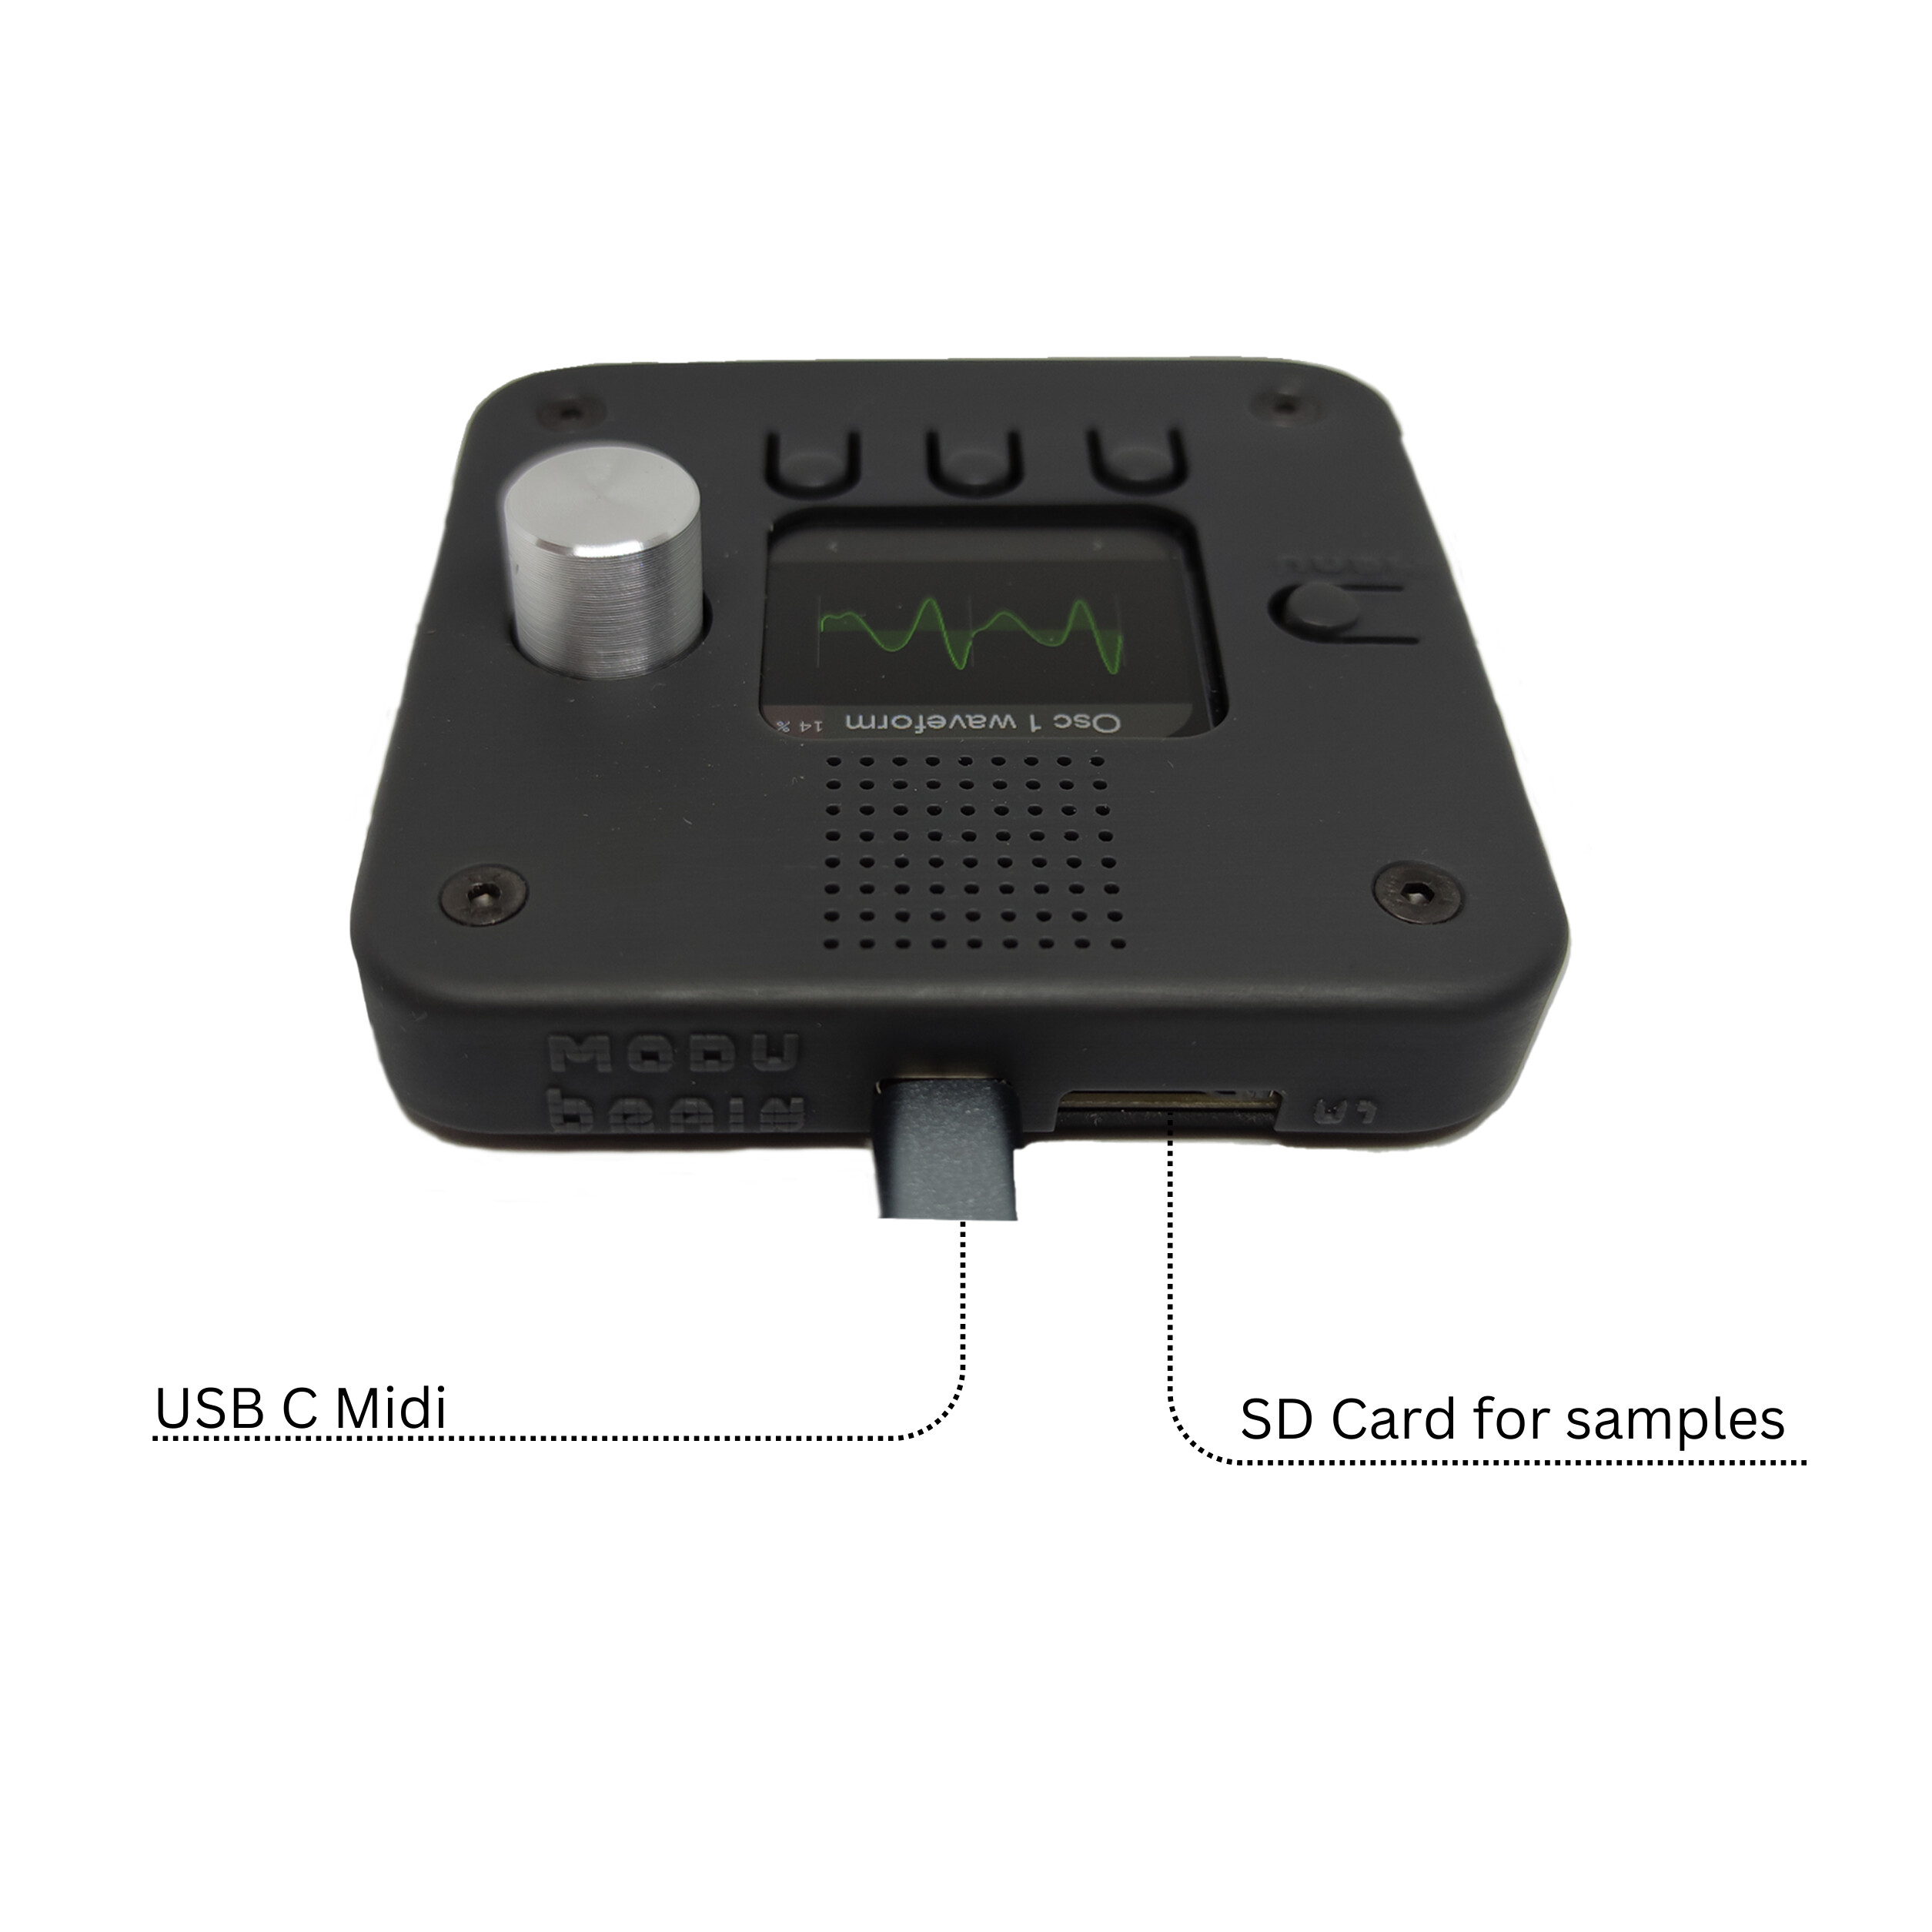
- Connect your Modulox Brain using the USB C cable.
- Open a Chrome browser.
- Visit https://apps.raspiaudio.com/.
- Select “modulox” on the left and choose the machine to load on the right.
Open Source Status
- Software: All our software is open source and can be ported to any ESP32 S3 device.
Repository: MODULOX_BRAIN on GitHub - Hardware: The hardware is closed source. This helps us pay salaries and develop new software features for the open-source community.
Additional Connections
-
Chaining Modulox Devices:
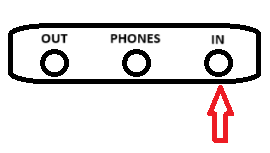
How to chain more than one Modulox using the jack sync cable?
plug TTRS jack 3.5mm “IN” port to a second Modulox “OUT” port -
Connecting Other Modulox Devices:
How to connect other Modulox devices using the magnetic connectors?
Align the magnetic pogo pins connectors fo a good snap.
Machines
1. Granulizer
-
Navigating menu:
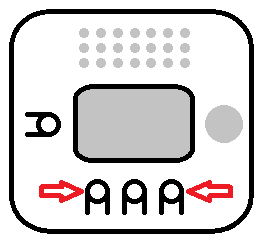
Click on left/right buttons to change menu pages.
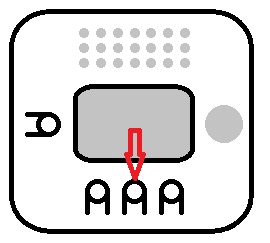
Or click on “menu” button then navigate by turning encoder and right/left to choose the page name in a menu list. If the name in the list starts by an “@” then it’s a page name. -
Loading a Sample:
- Direct record on the device.
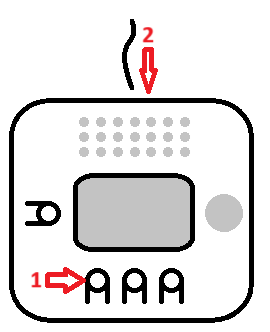
Go to “Select Sample” page and click on middle button. The record starts. Click again to stop. The record stops automatically after 8 seconds.
The sample is stored in the RAM and disappear if you select an other sample or turn off your modulox. - USB upload.
- Direct record on the device.
Keep pressing left button while plugging USB cable. Repositories will appear on computer. Drag and drop wave samples here.
-
Selecting a Sample
Go to menu “Select sample” and turn the encoder to change the sample. -
Connecting a MIDI Keyboard
Connect the jack-to-MIDI cable to input of modulox, plug the MIDI keyboard and it will work out of the box. -
Using MIDI Learn
When you are on a page with a parameter, click on the encoder and you will see a blue screen. Then turn your MIDI CC controller (USB or phisycal MIDI).The CC value will appear on the screen. Click again on the encoder, and it will be mapped.