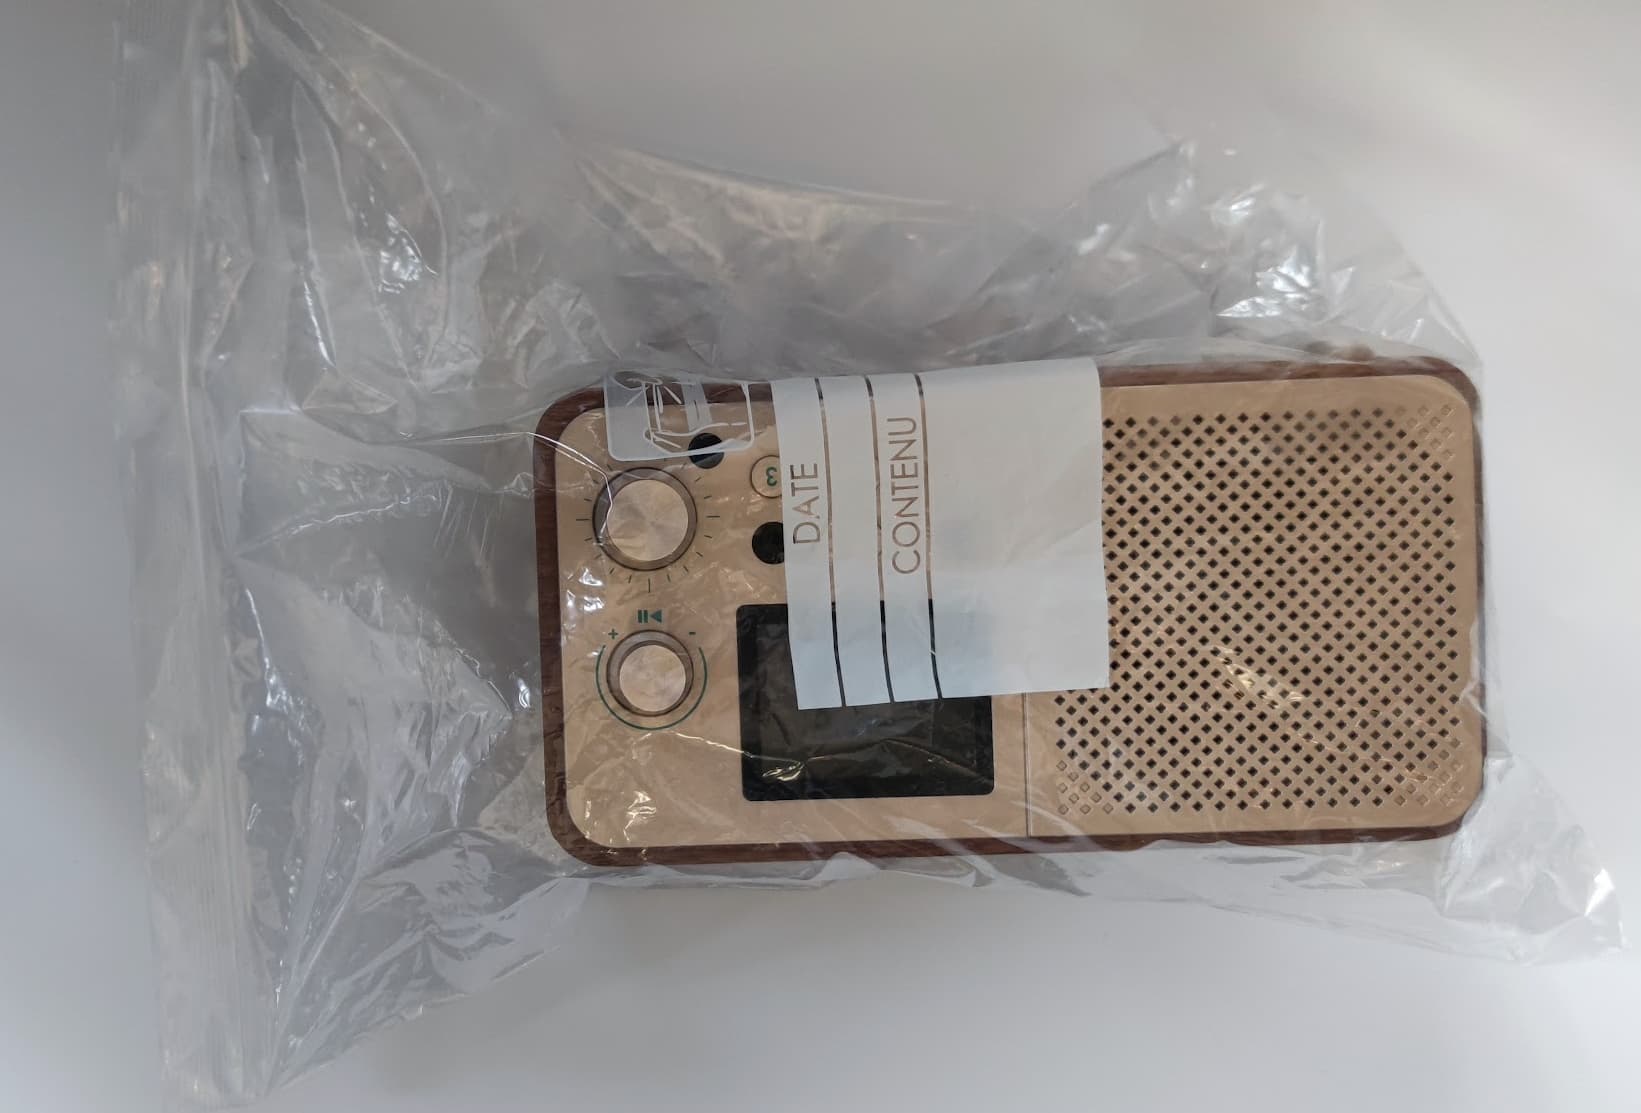
I got my Muse Radio today, thank’s for the fast shipmend.
Now I like to use it as Mediaplayer and start to work on the esphome yaml and switched the display to lvgl which also works, volume done and next is the cover image.
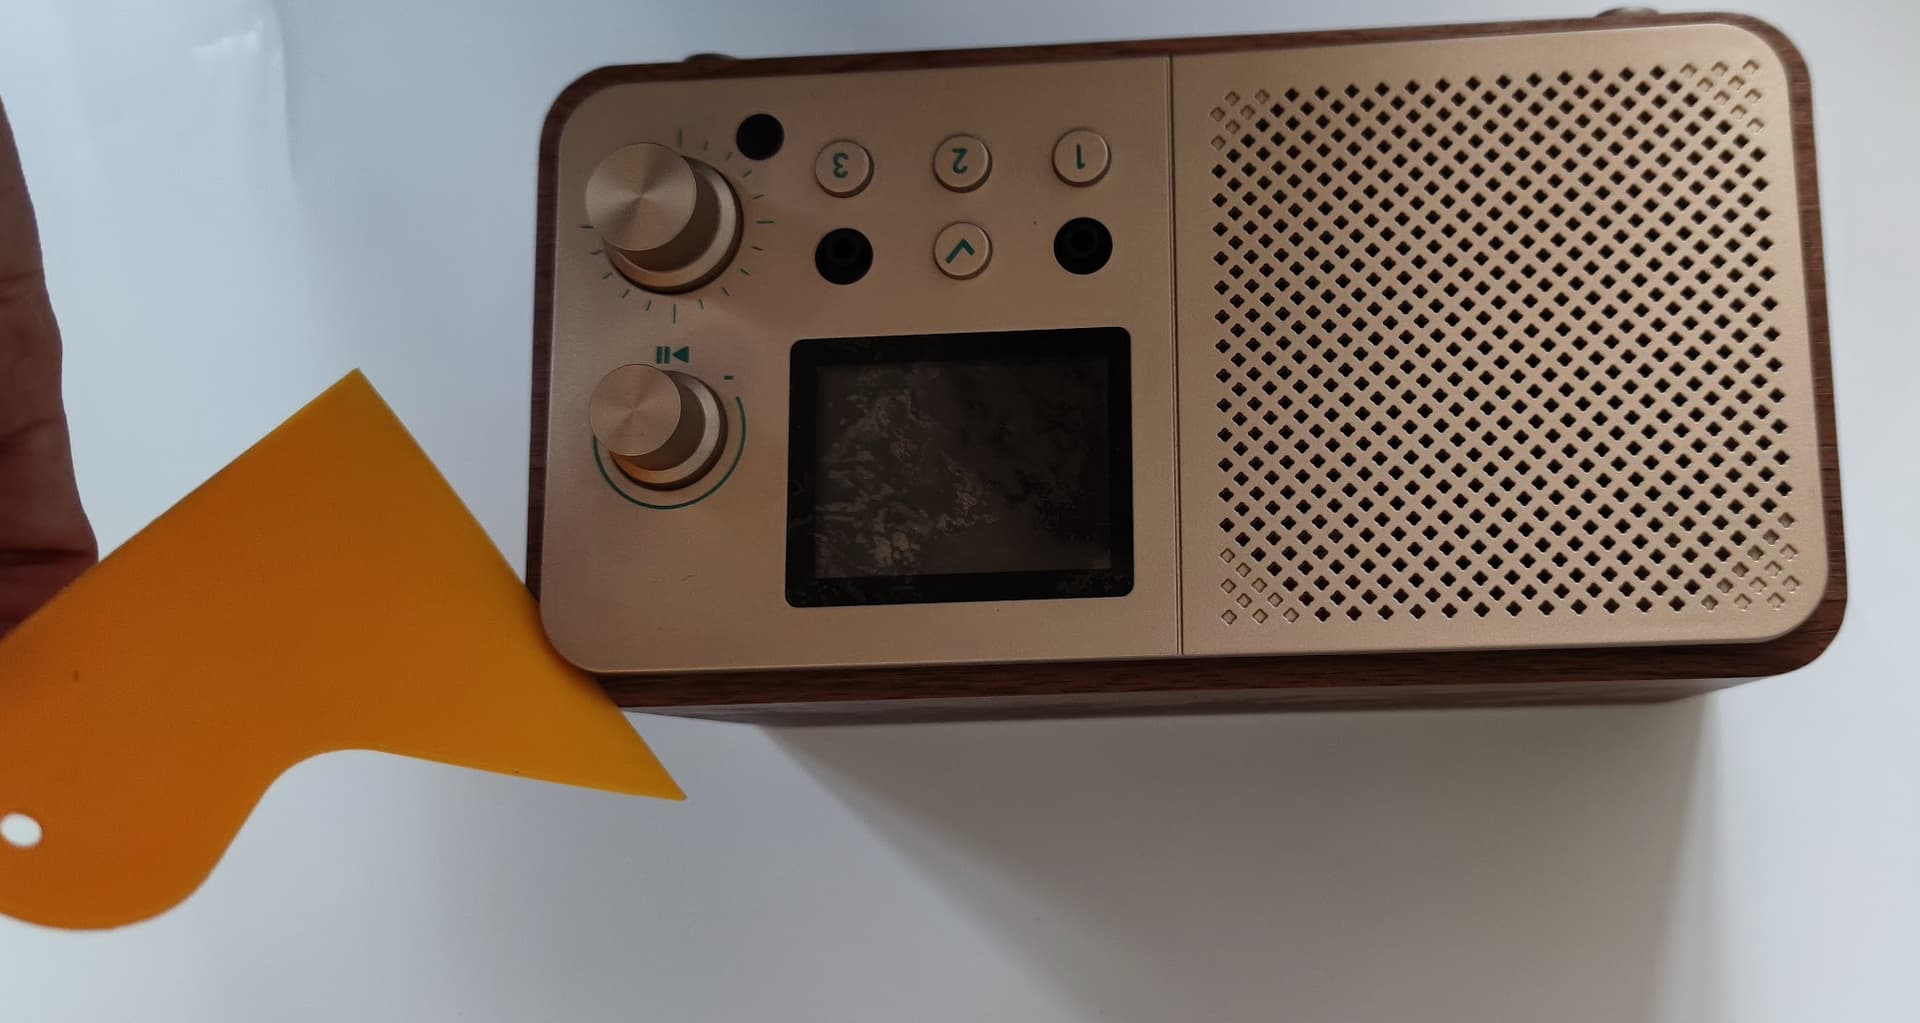
I also like to use the front panel buttons but do not find the GPIO pins used for them, maybe someone are so kind and share the GPIO pin documentation?
Media download works now too, but the audio is stutter while the online_image download is in progress.
The next issue are that the volume up and down is only possible in 10% steps, to go with 1% steps the command have to be set to home assistant (instead local on the device), but even here the sound is stuttering when the volume is changed.
Is there anyone who can point me to a solution here?
An other “issue” are that the volume below 5 is mute the speaker totaly, but a squeezelite instance even sourced by the Music Assistant is able to play at volume level from 1 to 100 (0.01 to 1).
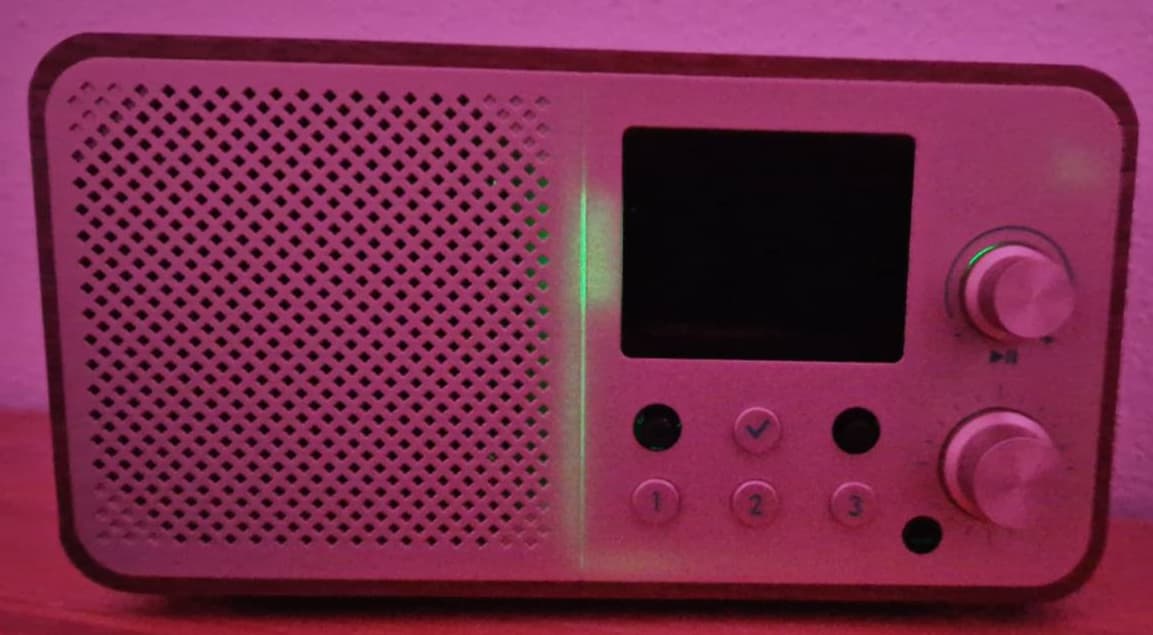
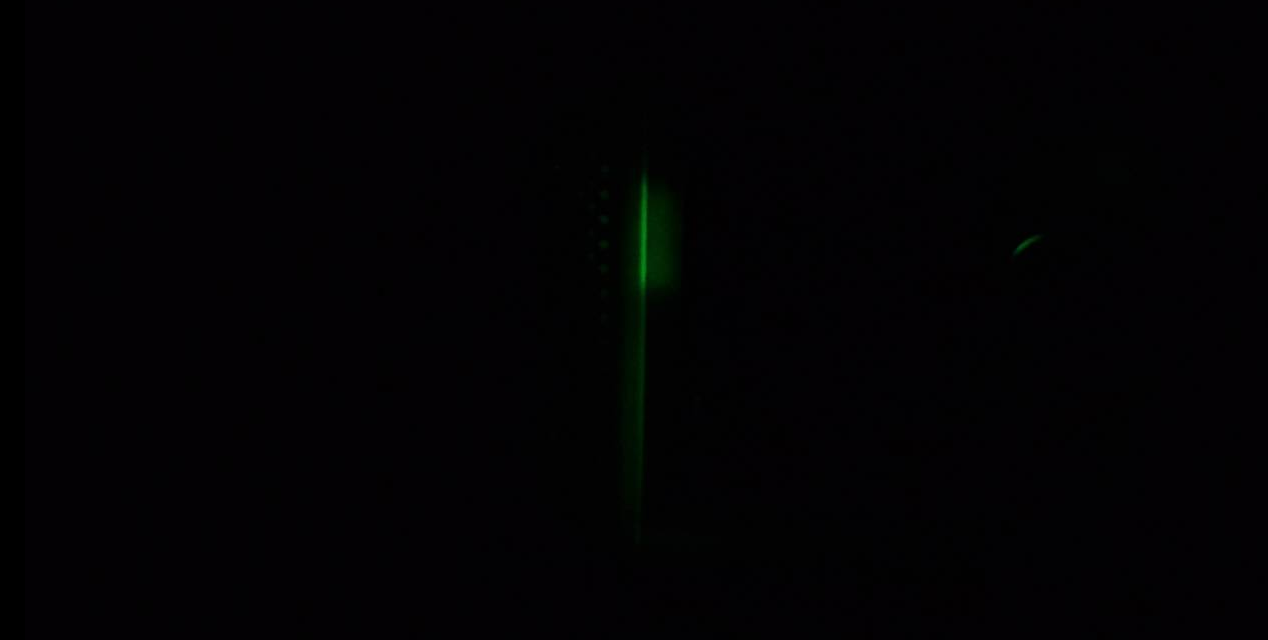
Is there a way do disable the led on the back side totaly by Software? I covert it with black tape but even then it lids through the front cover when it is totaly dark. Or if not how to open the case without destroy it.
Maybe you are so kind and support me in getting this sorted out.
I finally had some time to pick up the Muse Radio and just installed the latest repo from your github including the mediaplayer and micro wake word. Both work but is it correct they don’t work at the same time? Eg. when I play a spotify song through Music Assistant on the mediaplayer I can not invoke the voice assistant.
Ideally the mediaplayer pauses when the VA is activated and continues once the pipeline is completed.
Also, could it be the sound quality is not as good as in squeezelite? It’s doable but not so rich.
We have carefully reviewed your question.
Currently, the player and the wake word microphone cannot operate simultaneously. The wake word cannot be recognized due to interference from ambient sound.
This means that the player sound must be muted during the wake word detection phase and the question listening phase.
We will soon provide you with a new YAML configuration addressing this issue.
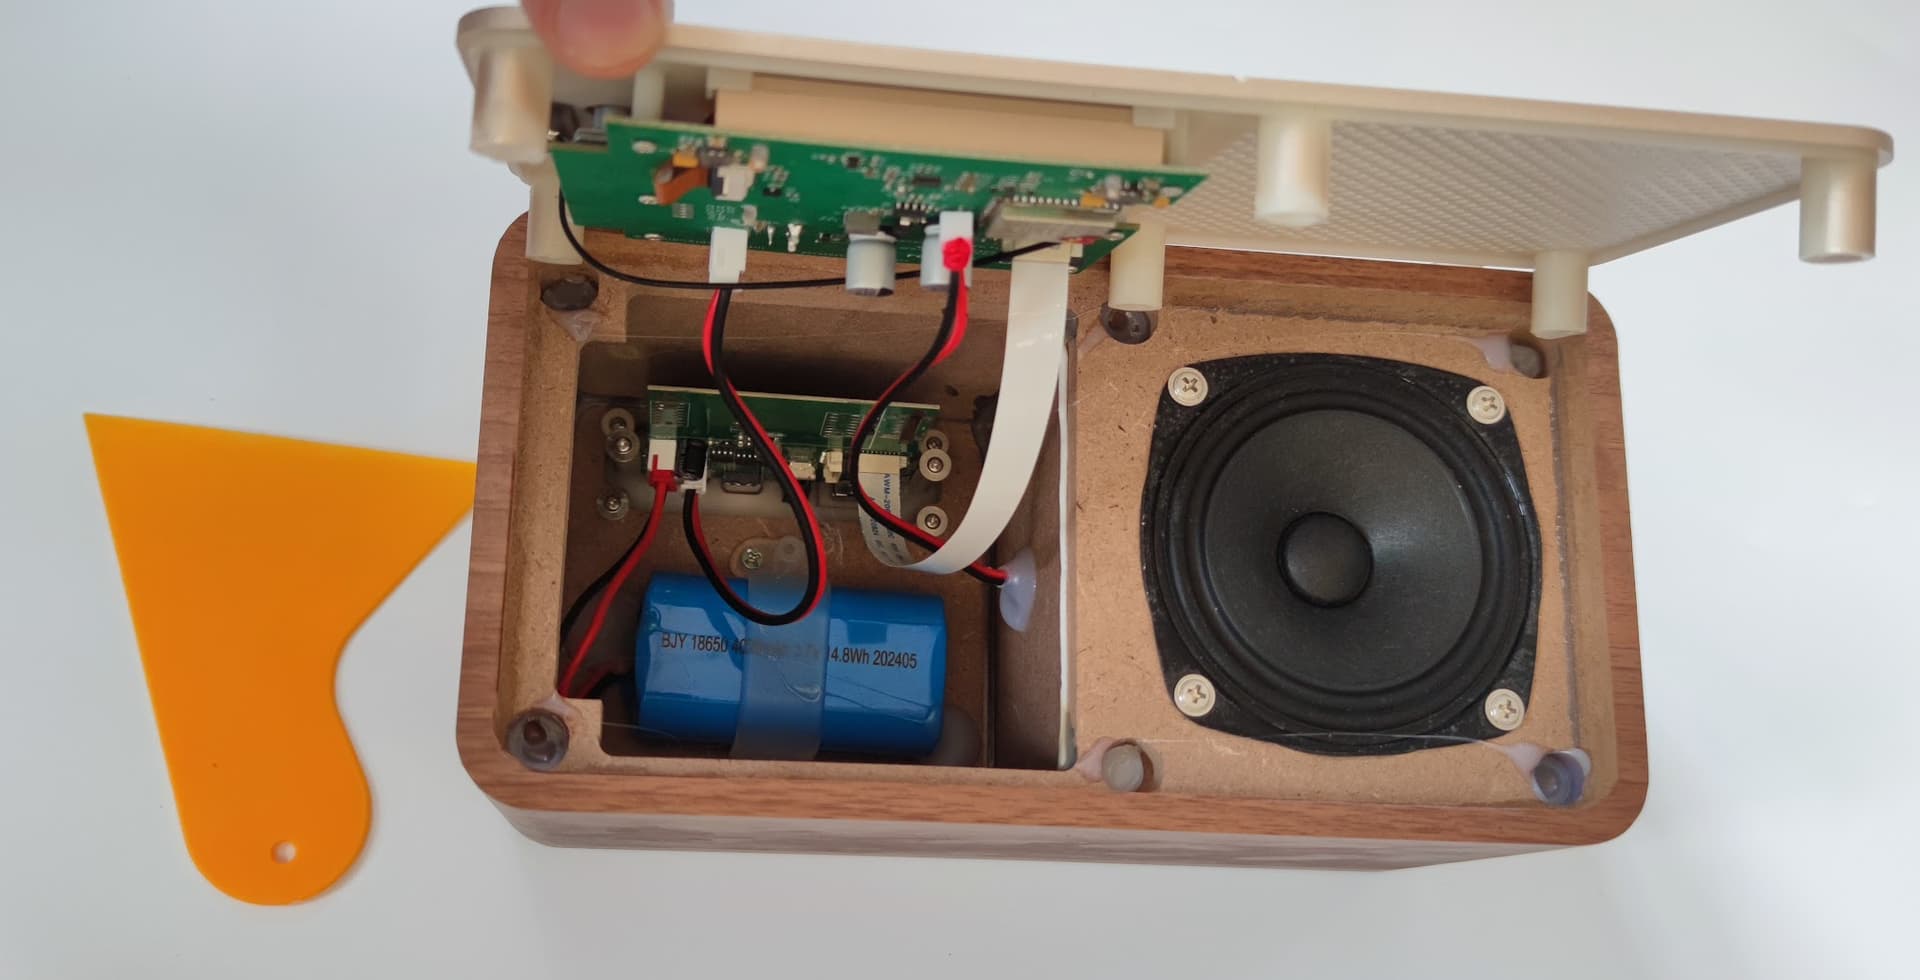
how to open up the Muse Radio Case without destroying it?
AFAIS there are NO screws and the LED build in makes it unsable in the bedroom, even when you cover the led on the back with blake tape, the light will emit through the front.
Second question already wrote above, how to play audio with the volume between 1 and 4 percent? By default at 4% the audio is off.
Hi Pbk, sadly I do not know a way to remove the front without risk of danaging the front cover. Have you tried to add the 2 included front jack rubber plug as most of the light goes thru there.
for the audio volume you with more precision at low volume, we will add it on next yaml release.
Currently we are still working hard on fixing the AAC bug of the player :
Create a open source device with an glued case without screws it’s a bit wired for me.
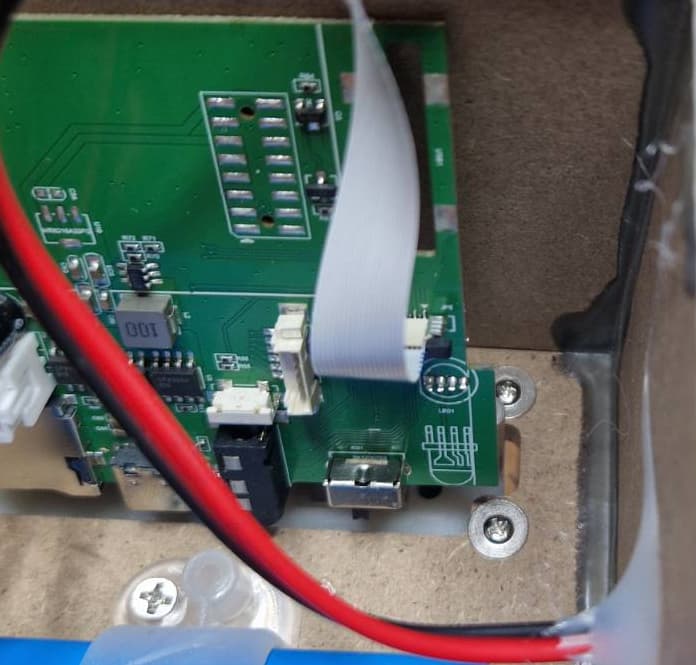
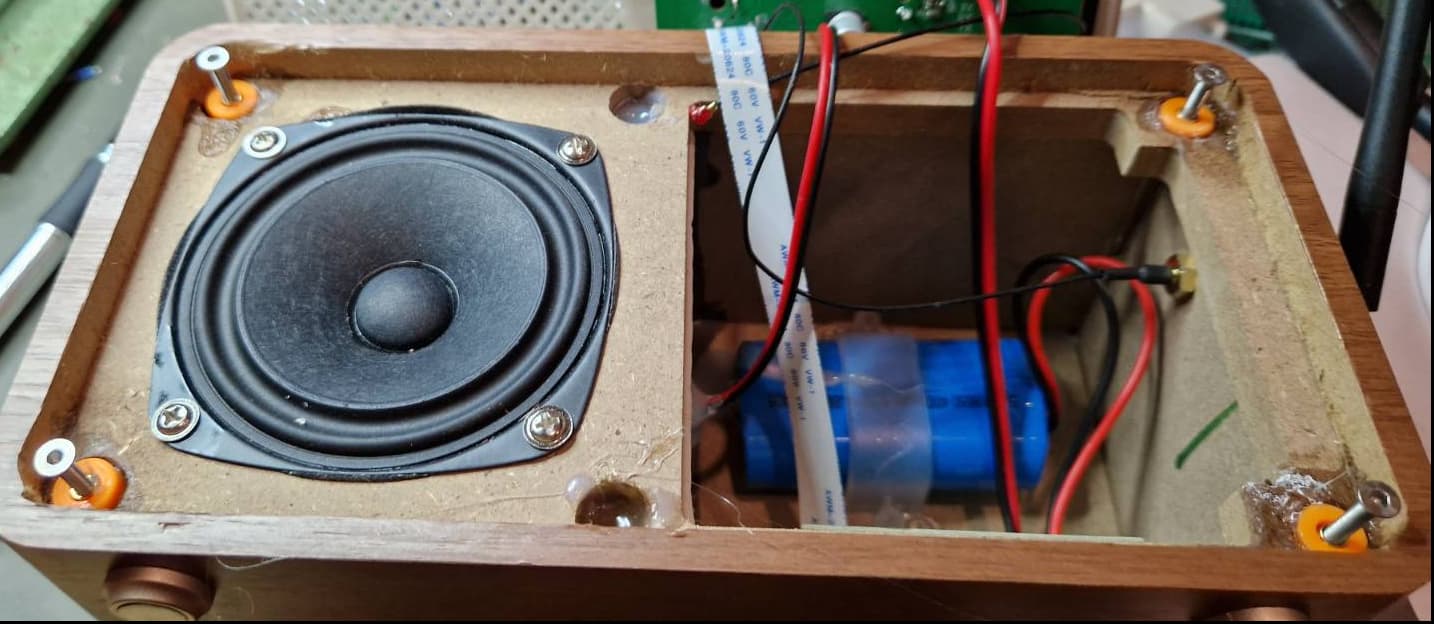
So I will cut it, to open and print a new case afterwards. Where are the antenna, battery placed inside?
My 5 cent about the Muse Radio:
For me the Assist is nothing I need, just a totally integrated / controllable audio streaming client driven by esphome.
Compared to the Muse Lux it is better because:
no white noise for two seconds when it reboots (with the poor WiFi antenna it reboots randomly) → but still sometimes a short noise before starting a stream.
display (why without brightness sensor?)
Even the ESP32-S3 chip with the 8MB PS RAM is not used ideal → when I change the volume the audio stutters → only because the LVGL display shows the value instantly → when I set a filter with an delay for 1.5s this is gone.
So I assume the PS RAM isn’t used for streaming and / or the second CPU core.
When I use a scrolling text label the audio is stuttering all the time as long the display is not paused.
The same audio stuttering when I show the cover on the display as long as the download und update of the display is not done, this can be up to 30 seconds if the media cover resolution is high.
Opening the case and replacing it is a project in itself that will void your warranty. It seems a bit overkill if your only goal is to disable the back LED—perhaps you could simply enlarge the LED opening on the back to fully cover it.
The LVGL display shows the value instantly; however, when I apply a filter with a 1.5‑second delay, the immediate update disappears.
Good to know—we’ll add that too.
It’s still very new, and we are improving it every day. We’ll publish a new version today for Assistant/Player, but please feel free to share your player‑only YAML—I’m very interested. Are you using it with Music Assistant?
Micro Wake Words: Supports multiple wake words simultaneously - Alexa, Okay Nabu, Hey Jarvis, and Okay Croft. If you want to enable only one, you’ll need to edit the YAML configuration.
Sound Control:
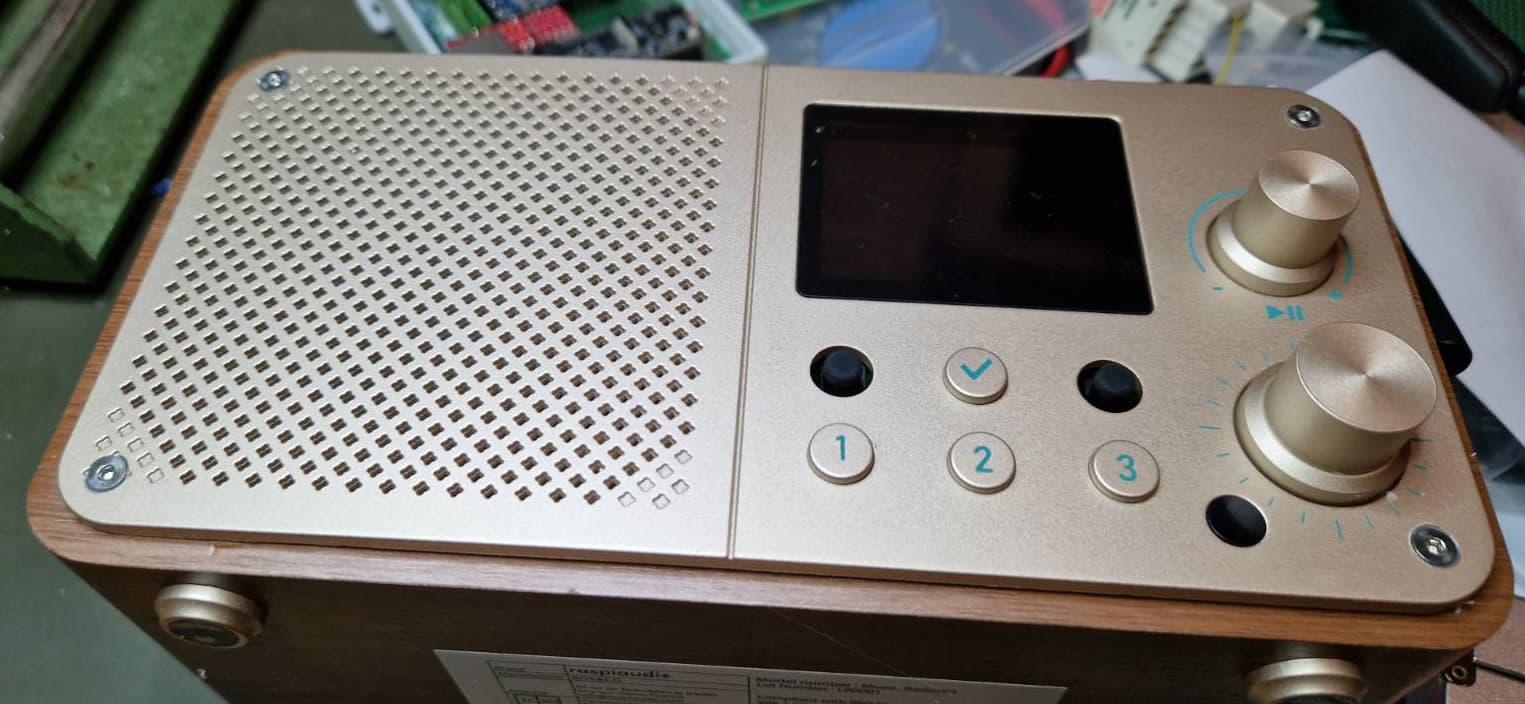
Adjust volume using the encoder’s rotate function.
Toggle pause/play with an encoder click.
Media Player:
Recommended to use Music Assistant for transcoding, enabling any file format playback and avoiding the AAC bug on the player.
Front-end Media Player Control:
Pause via the station’s encoder click to interact with the voice assistant.
Buttons:
Buttons 1, 2, and 3 are hardcoded for direct radio station playback. Press the button to start or stop the station.
ESPHome Radio for Raspiaudio Muse Radio
This project is intended for the Raspiaudio Muse Radio.
Great! Will try over the weekend. The hard coded stations, what type of stream do they need? Can any radionet or tunein url work?
Really impressed with the box. The microphone and speaker outperform the Nabu Casa voice preview edition, the screen is much better than the ESP S3 Box 3… i think you are just scratching the surface of what it can do!
I think that it will work,try and let us know!
Still need to fine tune how the buffer works and also maybe turn down wifi power to have a more reliable connection, it is still a work in progress. So I think we are not yet at the stability level voice PE but we are getting there !
I would like to add a brightness sensor like a BH1750 I use on all my other projects to control the screen brightness exactly.
I would love the product much more if it will be more open → yes screws to open the case and not only to mount the feed!
Especially the 18650 battery that is build in needs to be replaced / removed in the future!
And if I do get two additional pins for a uart connected mmWave Sensor like the LD2410 Sensor — ESPHome then I could light ub the display only if the distance is less X with only the brightness needed (BH1750).
Therefore I will open up the case, and believe me the warranty is nothing I care about.
Hi, I got the Muse Radio recently and I have to say that the sound quality is good way better with the Squeezelite or the default app that with ESP Home.
I also wanted to see the inside and I found a way to open the Radio without any damage here is the receipe based on the fact that the hot glue shrinks and does not hold with cold temp:
put the radio in zip lock bag and put it in the freezer for 3h
I’m not related to Raspiaudi, use this technique at your own risk, I’m sure that cold temp is not great for batteries, but mine is still working
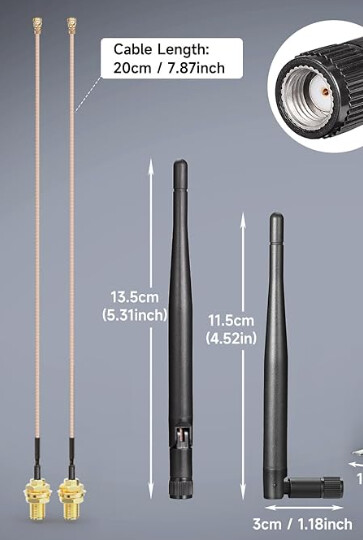
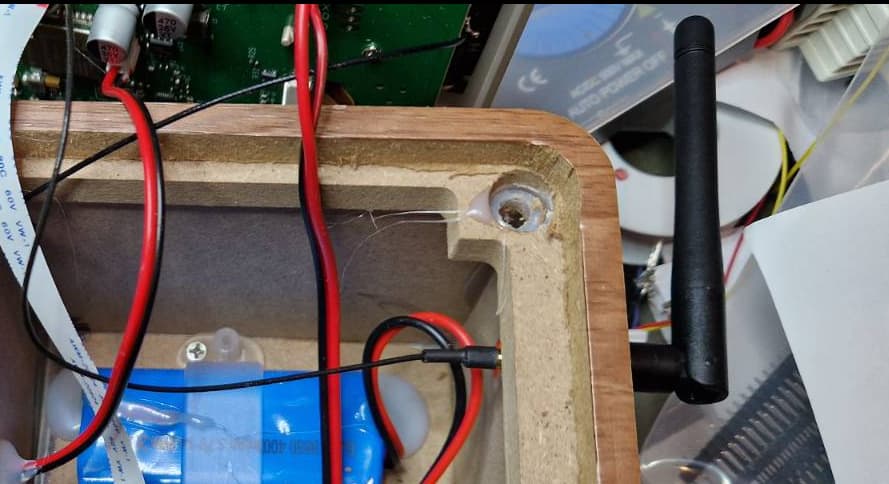
my goal is to install an external wifi antenna like this one so I will make a hole on the back of the case then connect ir to the ESP32 as it already has an antenna connector I could do it without soldering.
If anynone else wants to get rid of this LED and do not want to freeze the device first.
It is save to destroy it with a drill
→ there is nothing you can hit behind the led as long as you do not move to any side and do not drill deeper than 20 millimeter.
Just an idea for the light sensor it worth to try the IR receiver on gpio47, even if not optimised for the visual light spectrum it probably getting some ambient light data, maybe enough to drive the screen brightness.