Revive Your Speakers! MEGA AMP, the High-Power, Affordable Solution for Transforming Your Passive Speakers into a Hi-Fi Experience!

Pre-orders have been shipped out, and we have a few left. After the pre-order testing phase, it will be available on Amazon.
More info at : https://raspiaudio.com/produit/mega_amp
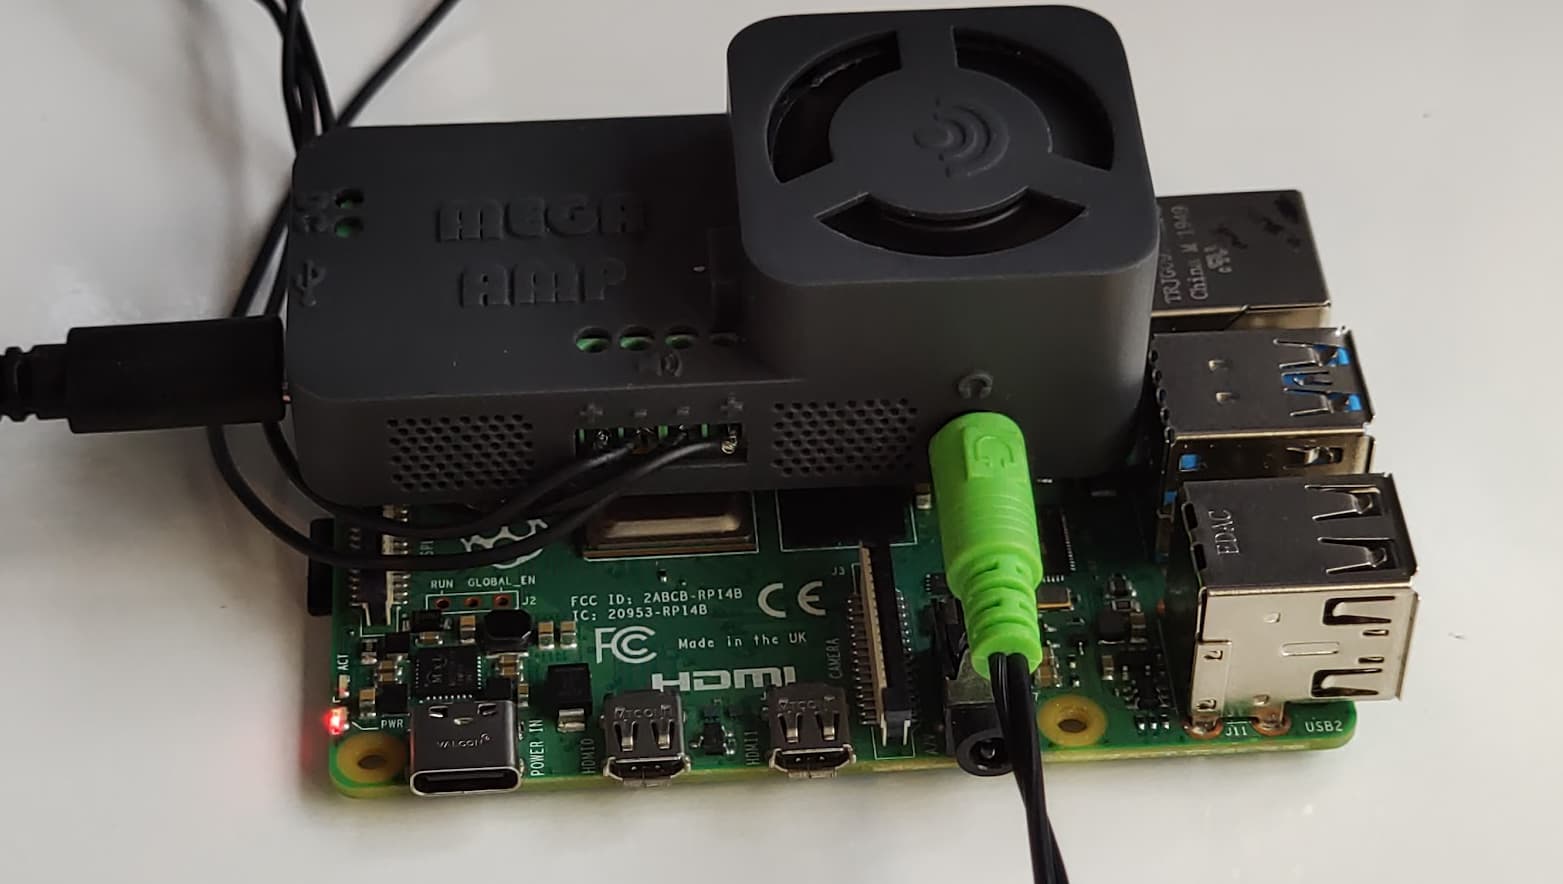
Powering Options There are 3 ways to power your Mega Amp:
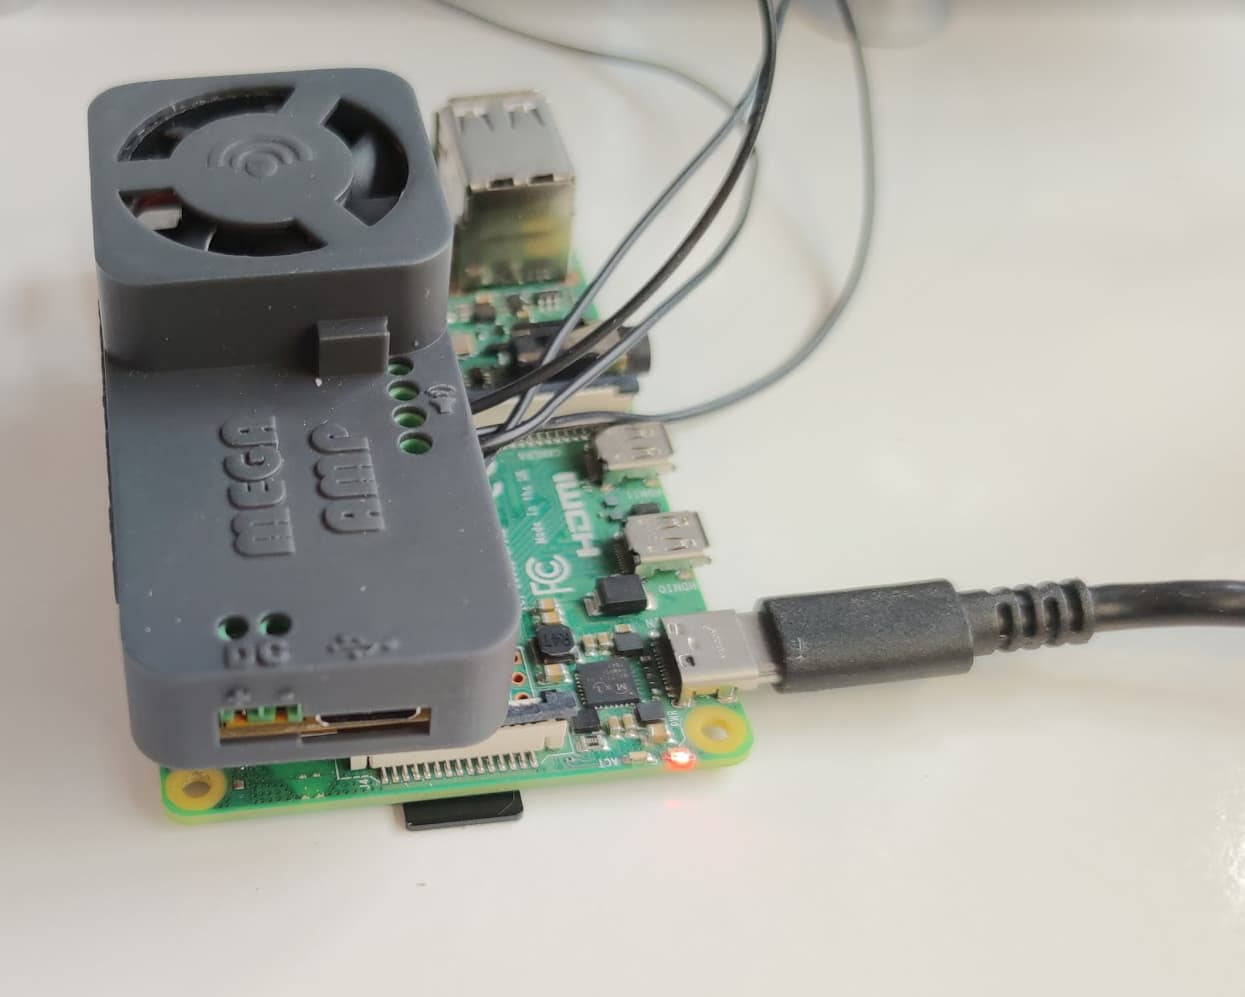
-Use a USB C Power Delivery (PD) supply: This is the preferred option, as it is becoming the universal way to power electronic devices. It will negotiate the right voltage with the power supply, with the MEGA AMP defaulting to request for 15v from the USB charger. USB PD devices are becoming quite cheap. Look for a 100w supply if you can, though 65w are also fine. This option will provide ample power to your Mega Amp and Raspberry Pi, meaning only one powering cable is needed for both!
-If you only have a regular USB 5v power supply: No problem, you can still use the usual powering port of your Raspberry Pi. However, the power of your speaker will be limited and not reach its full potential.
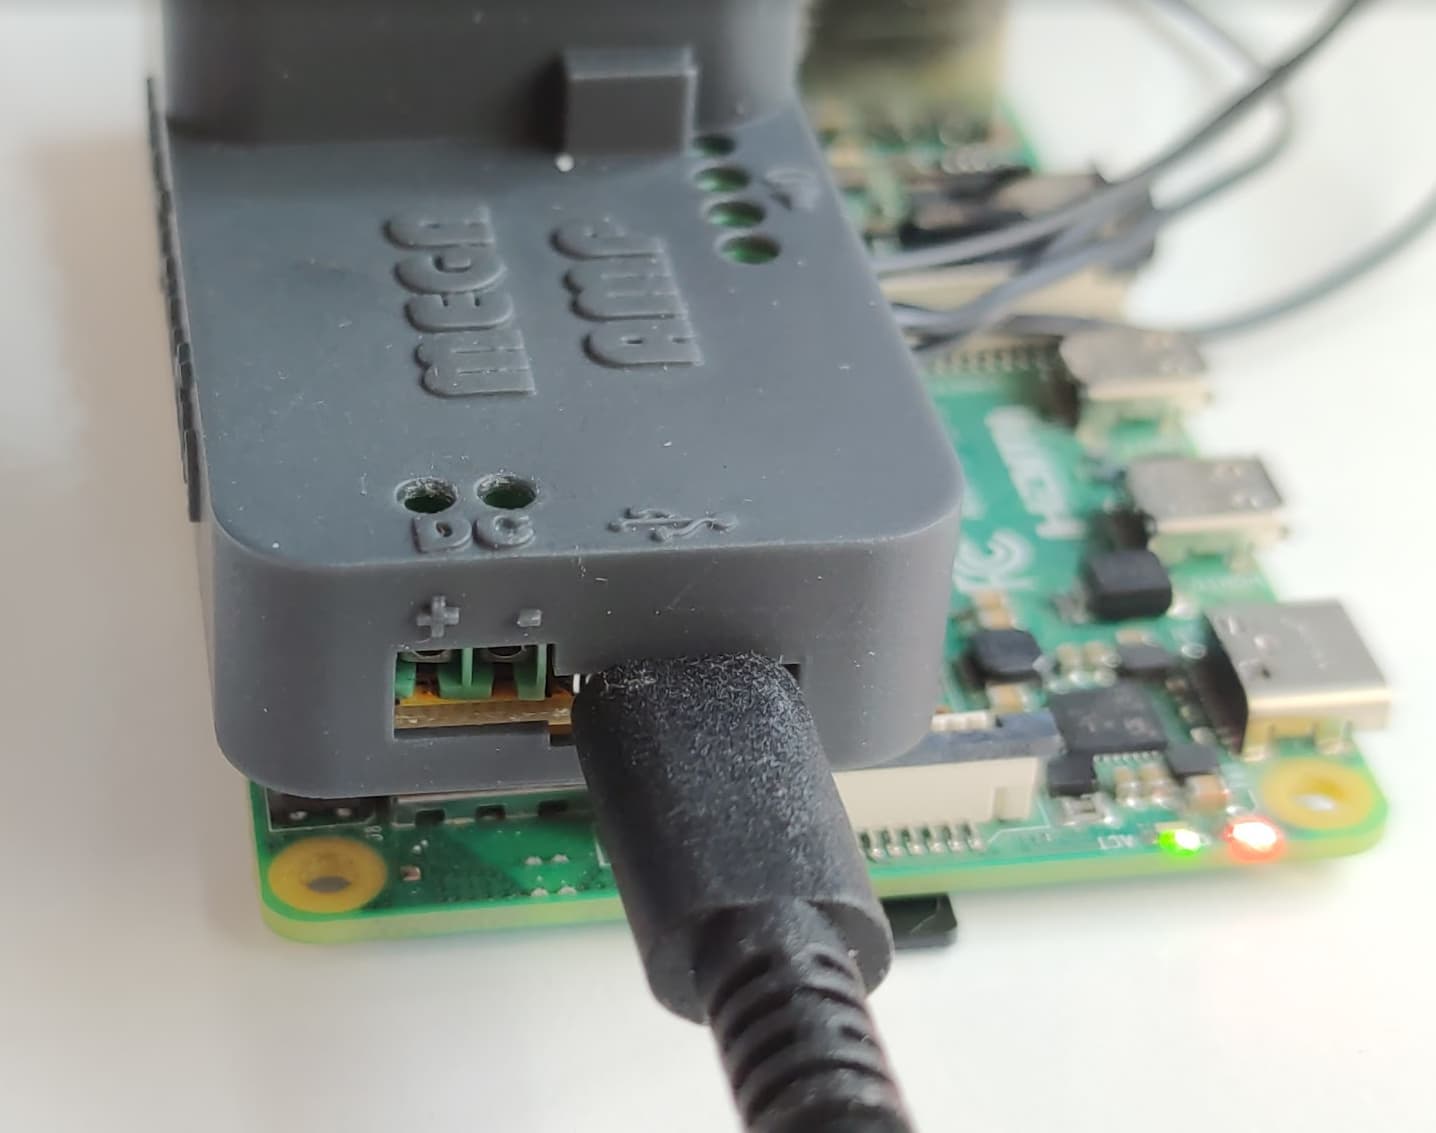
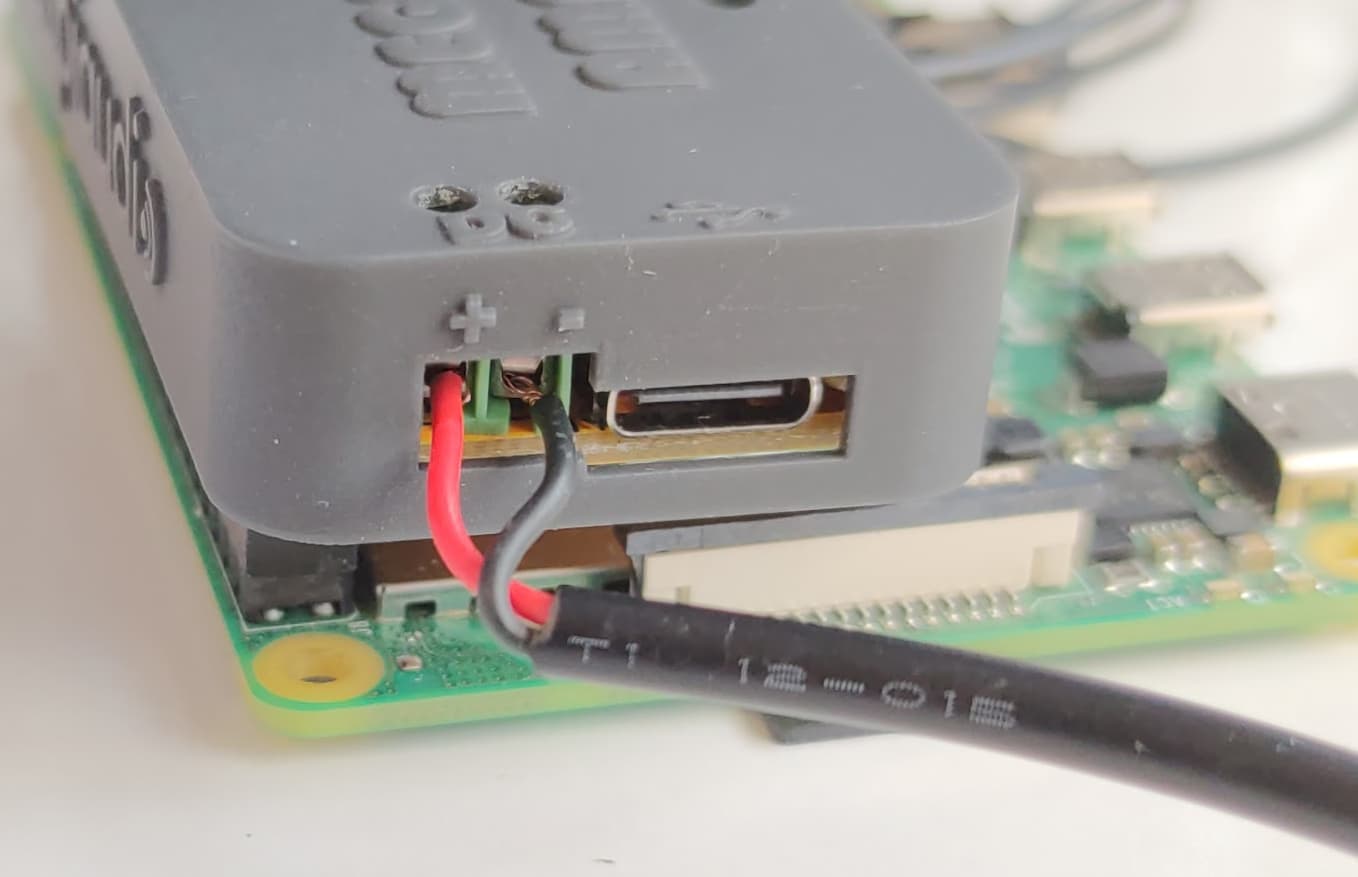
-Use bare wire to provide DC supply: We recommend using a 12v supply with a minimum of 4A. Please check polarity + is on the outside. You can use a power supply up to 20v, but this will create more heat. 15v offers a good balance between power and heat. In this configuration, it will also power the Raspberry Pi.
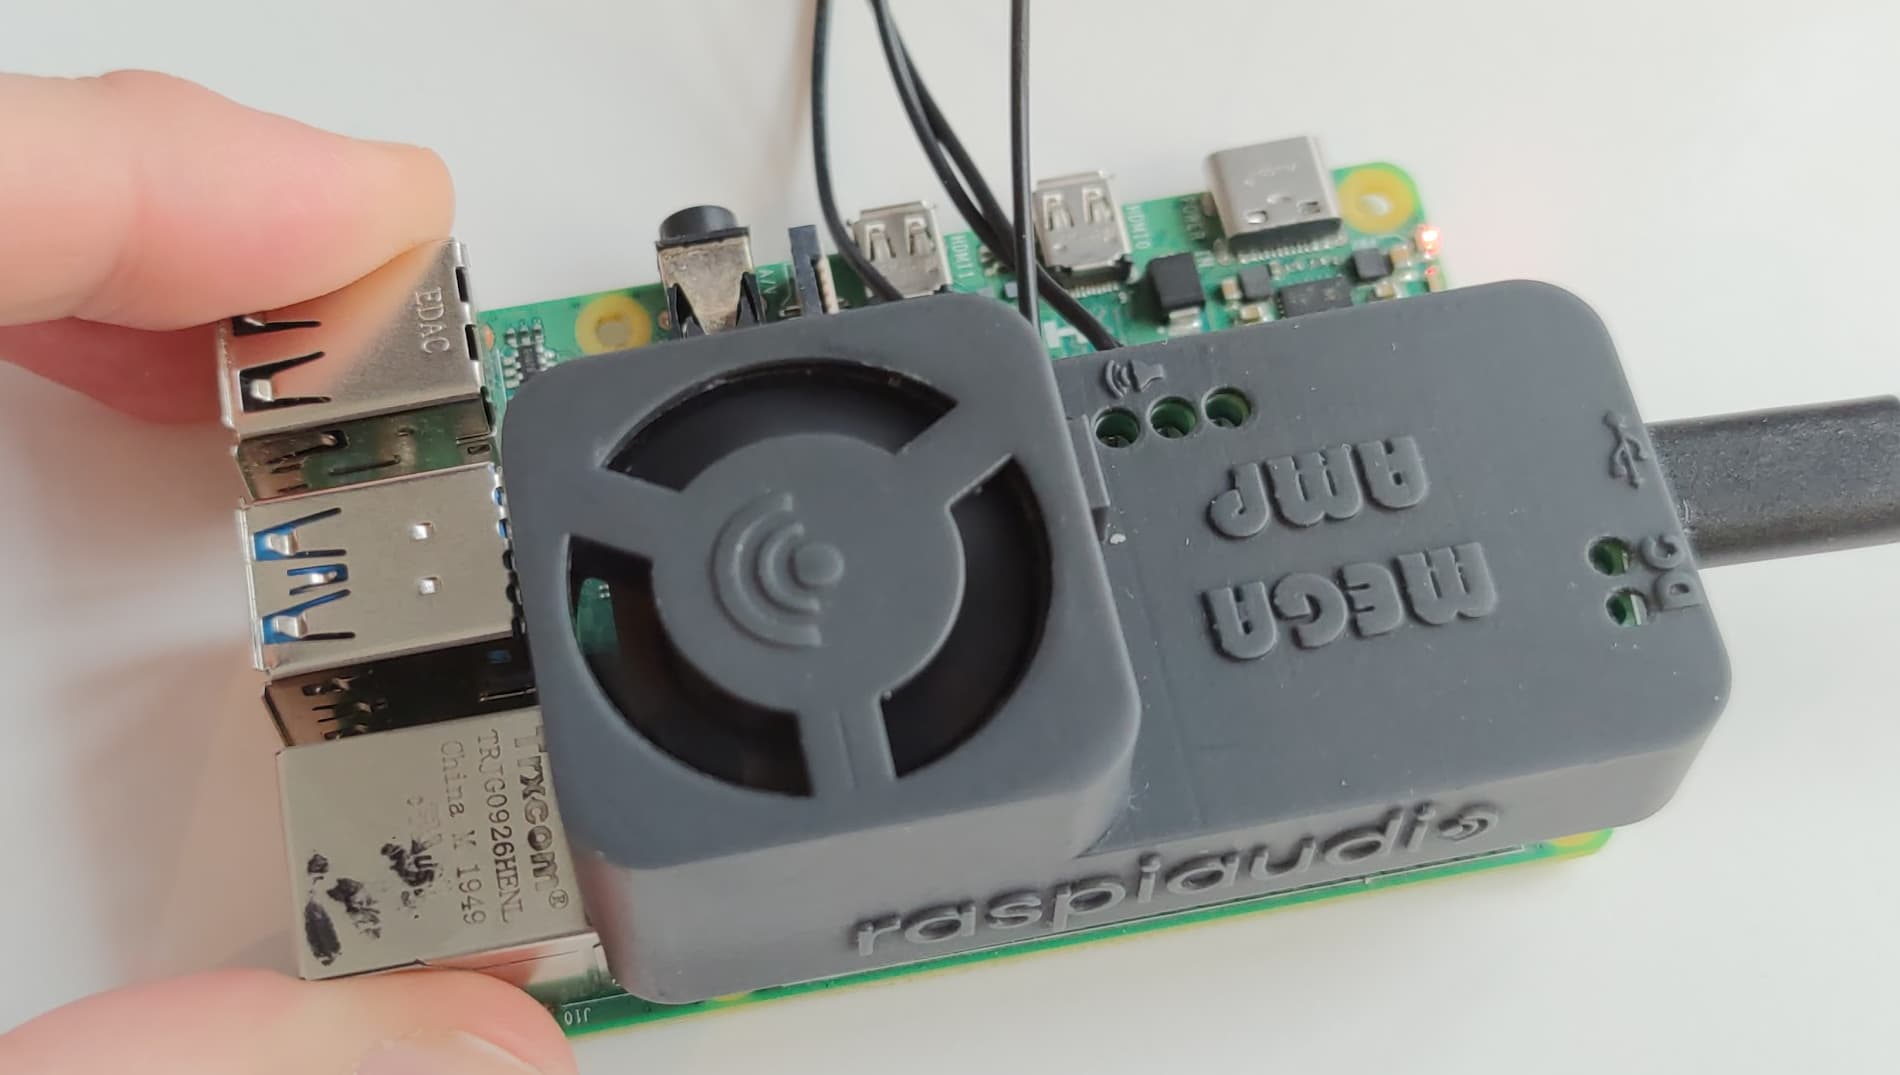
Connecting Speakers
Any passive speakers of 4 or 8ohm will work. To ensure you don’t damage them when using at full volume, it is better to use something rated at 50w or above. Check the polarity of your speakers; if you mix them up, you’ll hear a muffled sound, but this will not cause any damage.
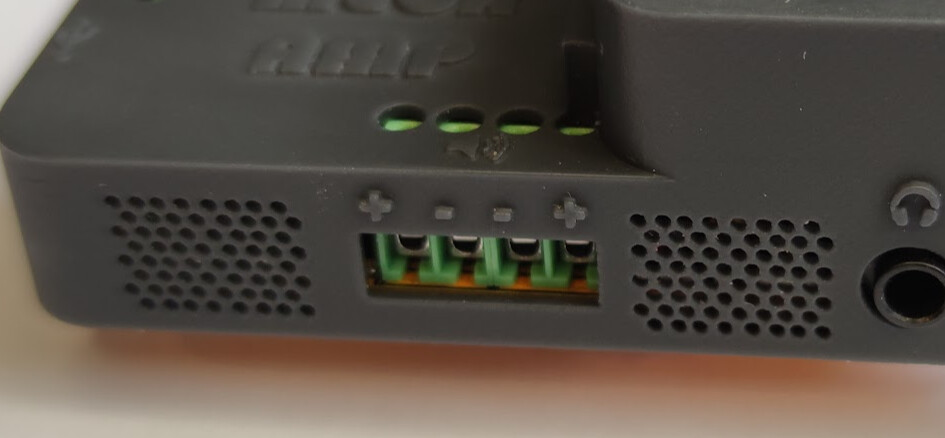
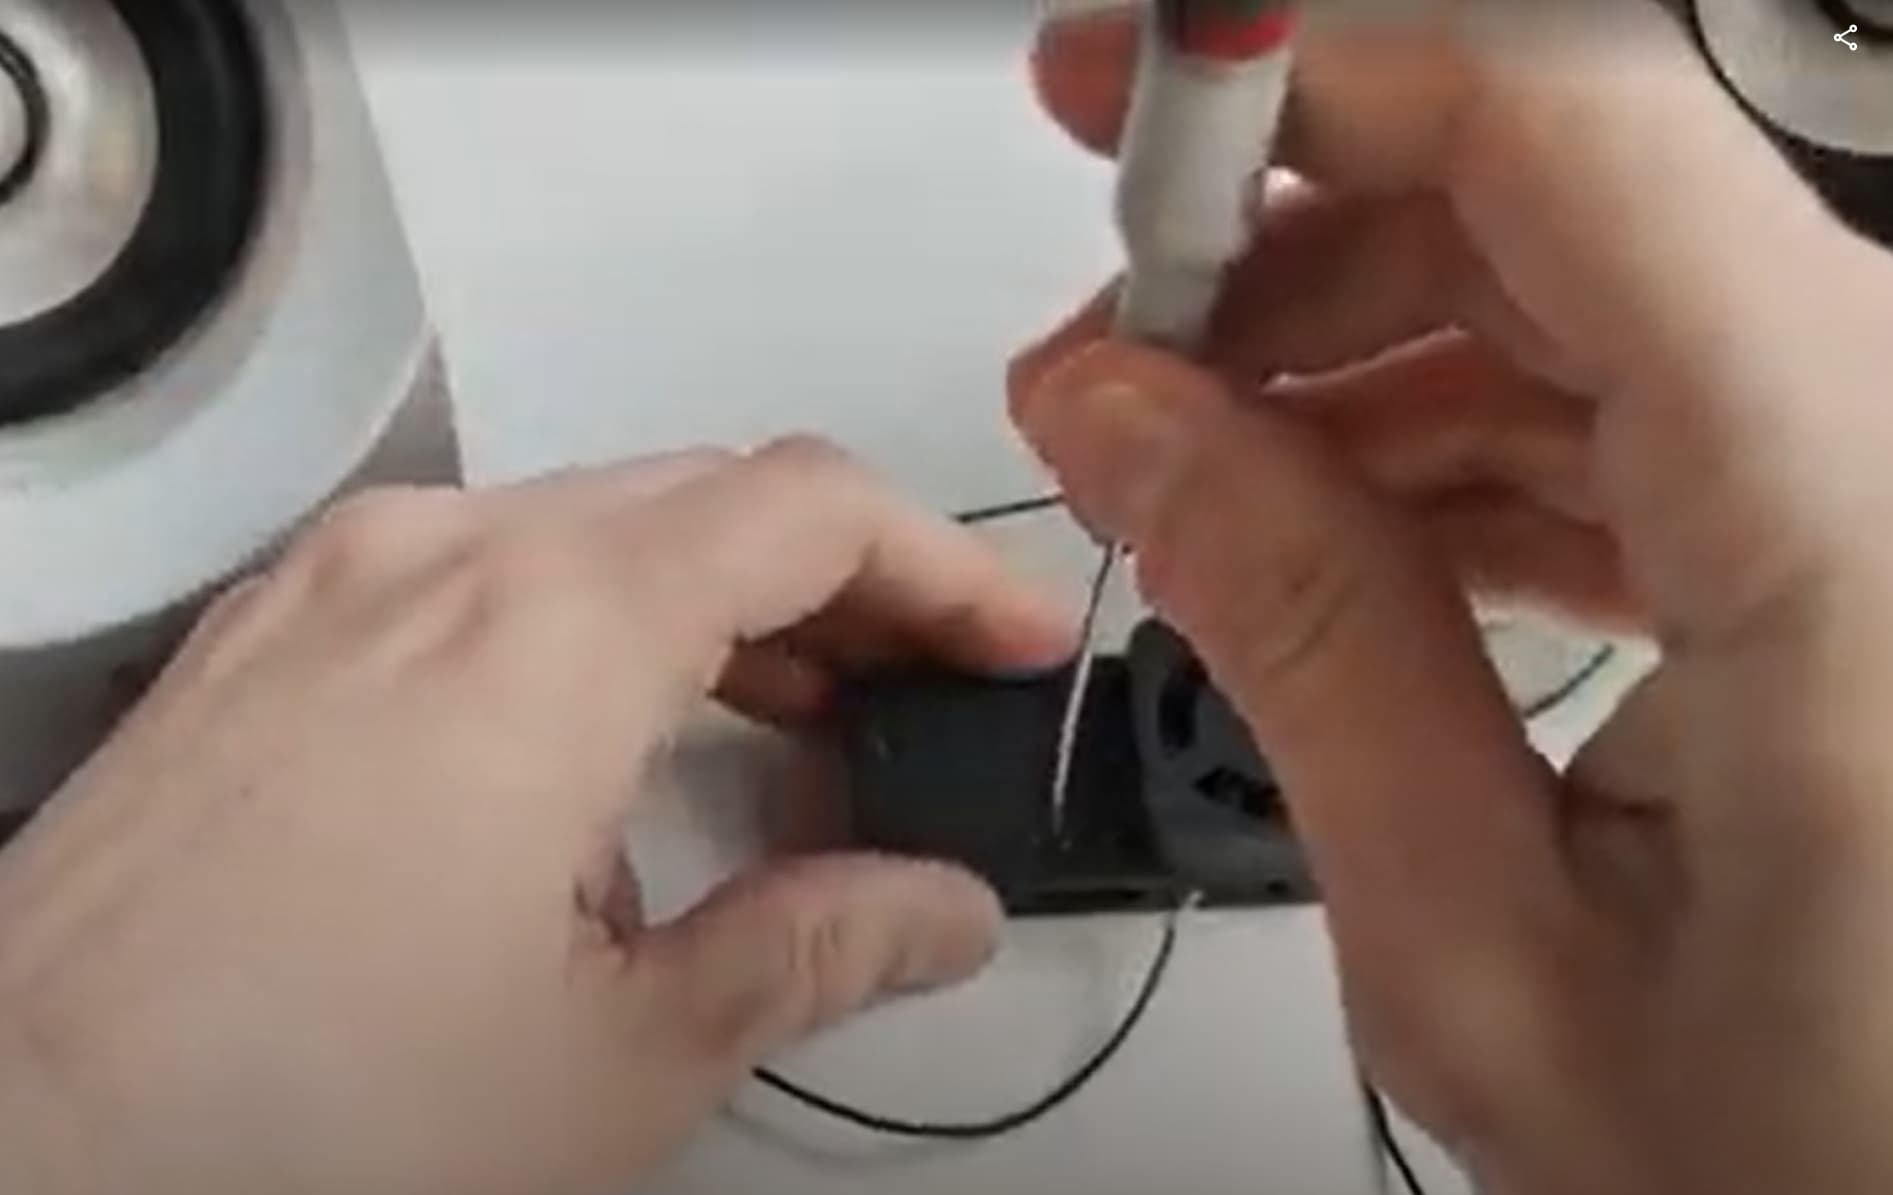
Use a small screwdriver to loosen the screw, then insert the cable and tighten the screw again.
Please note, it is possible to add headphones here:
Installation Process on PI OS:
Edit the /boot/config.txt file, which you can directly find by inserting your SD card into a Windows, Mac, or Linux computer. Alternatively, if you’re running Raspberry Pi OS, type:
sudo nano /boot/firmware/config.txt
In the file, search for “dtparam=audio=on” and add a “#” before it to disable it. It should look like this:
#dtparam=audio=on
This step is used to disable the built-in audio of the Raspberry Pi, which isn’t of the best quality.
Then, add the line:
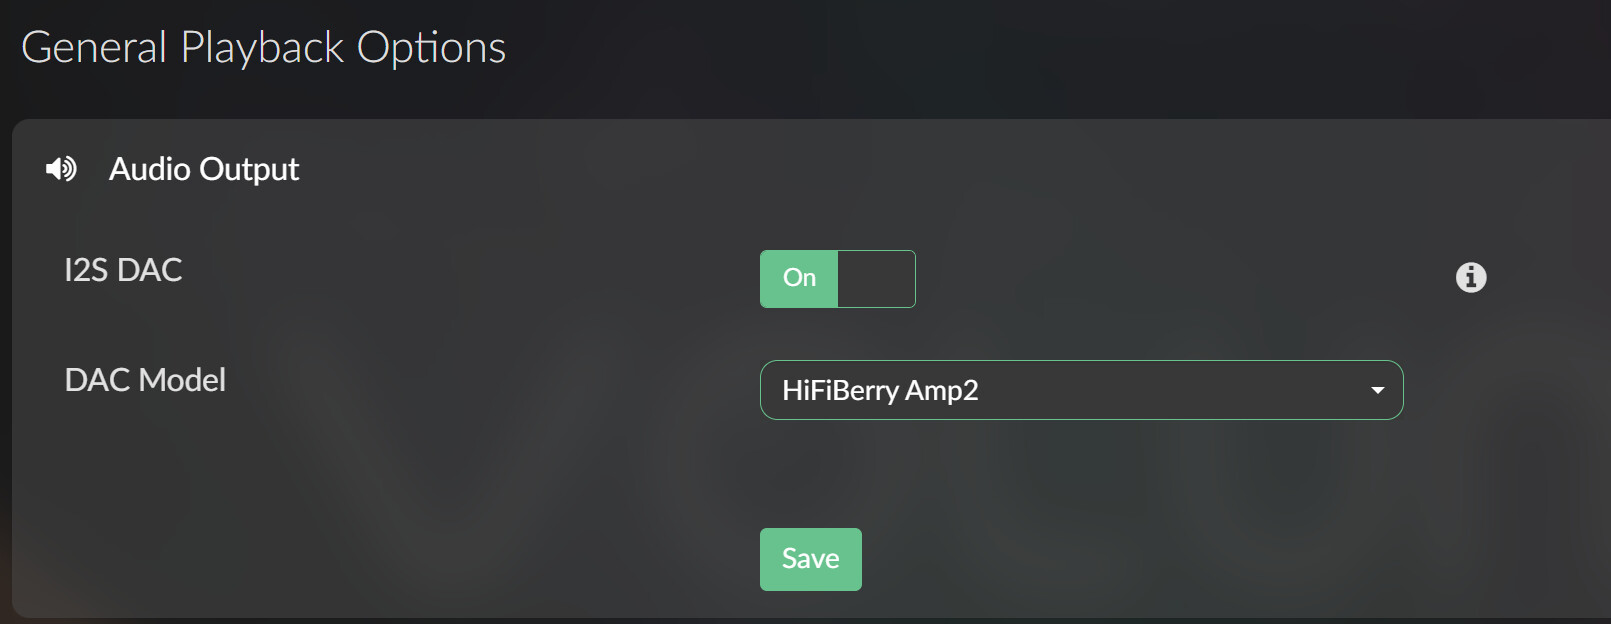
dtoverlay=hifiberry-dacplus-std
As of now, we are using hifiberry drivers as they also use the TAS5756M and are widely supported on many platforms such as Volumio.
After rebooting, on the PI OS desktop, you’ll see the speaker icon in the top right corner. Right-click on it to select your new audio card.
Fan There is a fan continuously running to cool the device down. It is very quiet.
VOLUMIO
Just install VOLUMIO using the official Raspberry Pi Imager
then select :
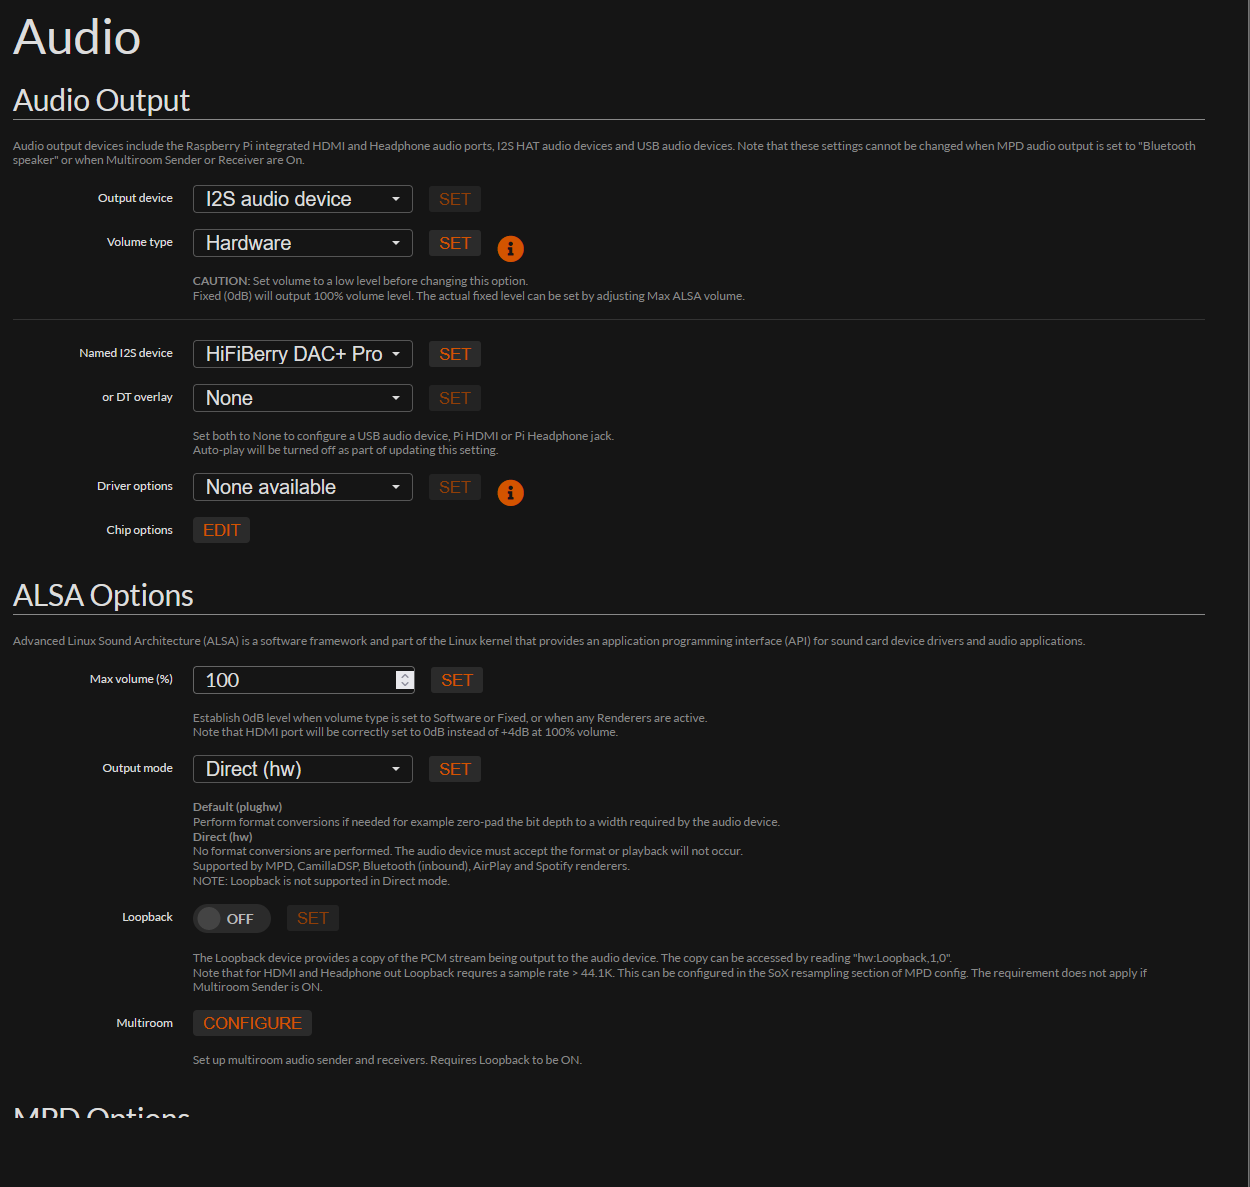
for volume option I am using :
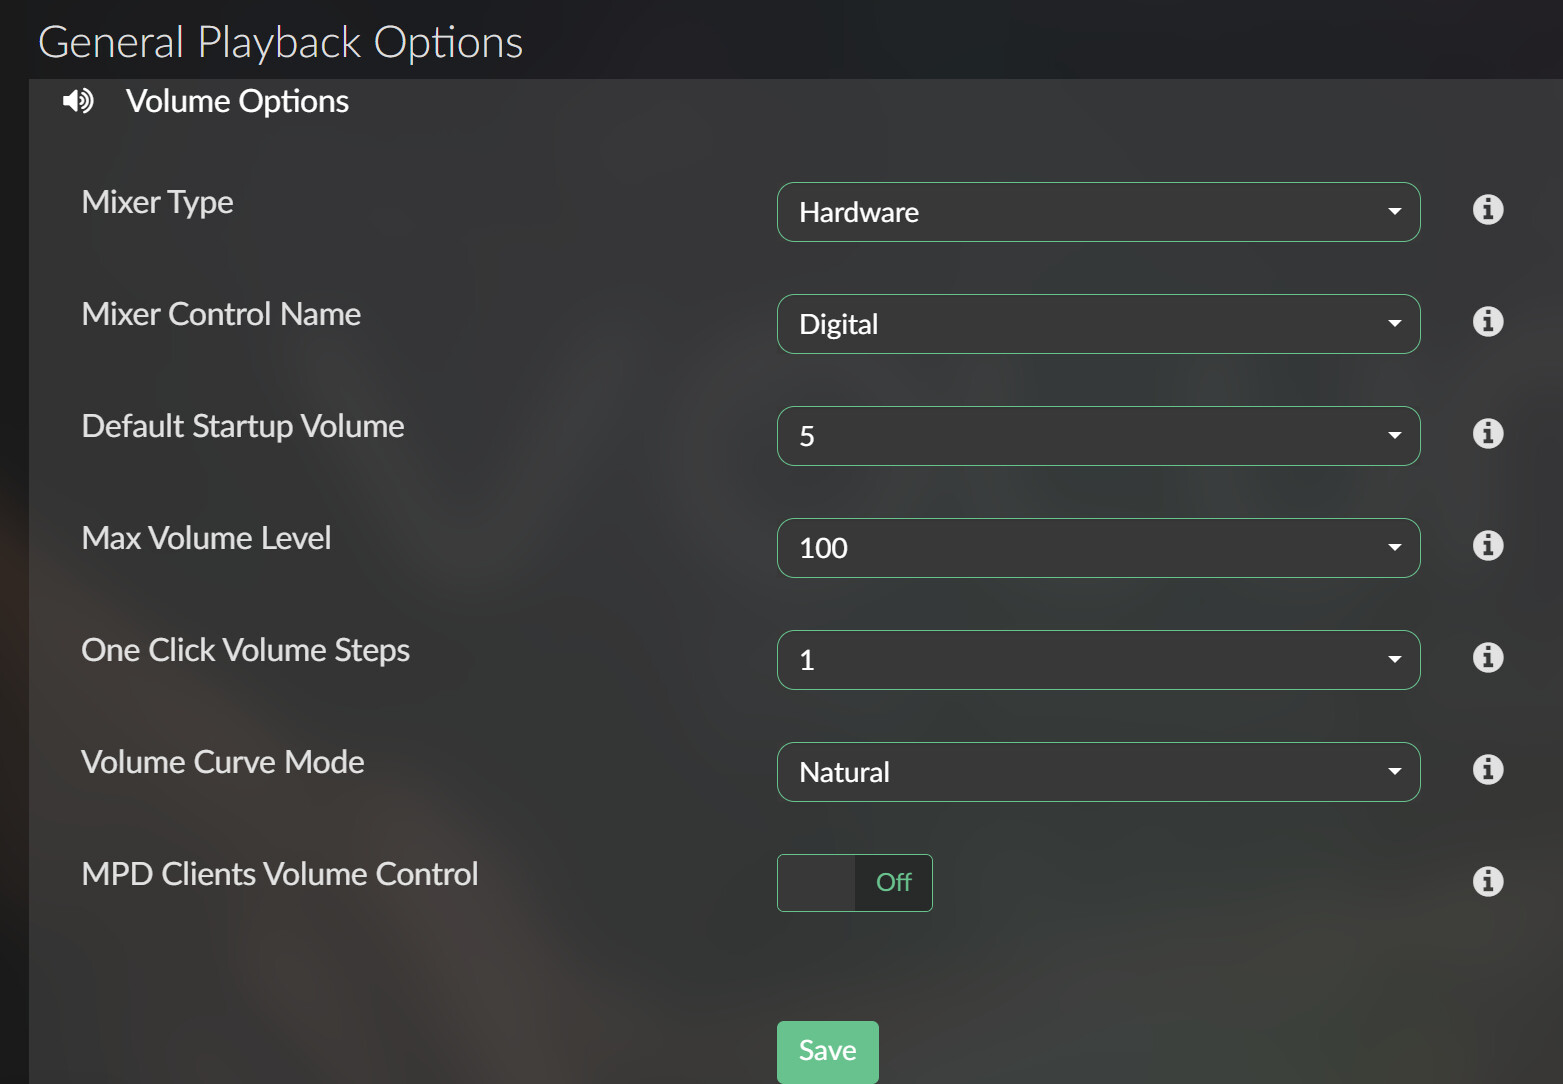
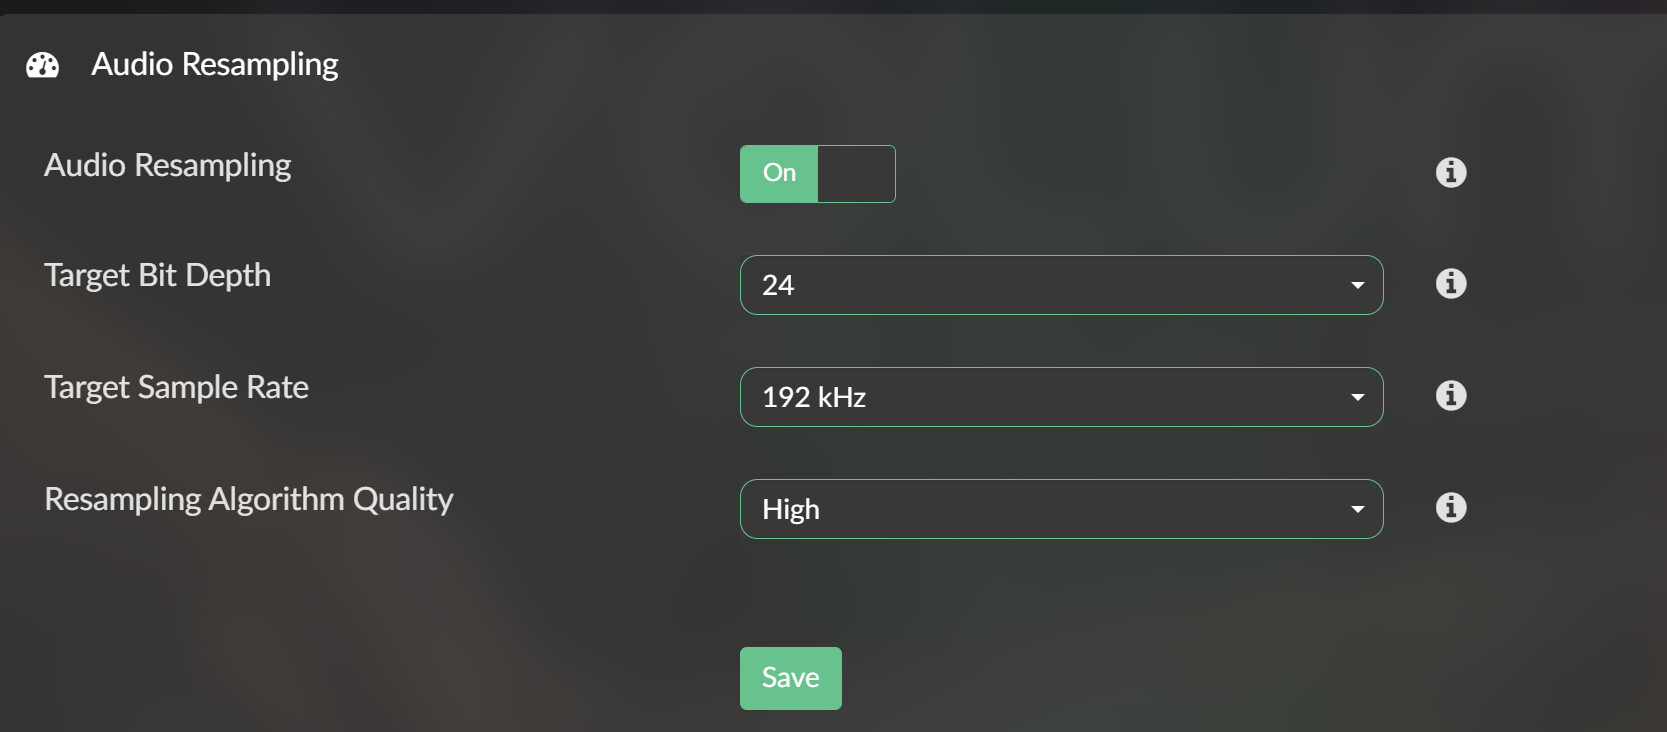
Resampling (optional, it might be too much for a RPI Zero, I’m not convinced that it actually improves quality)