We’ve just pushed a brand-new open-source firmware for the RaspiAudio ESP MUSE Luxe & Proto boards.
It delivers full A2DP Bluetooth, jack-detect, RGB status LED and a start-up jingle—all configurable at run-time.
The best part: a browser-based configurator flashes the latest binary and lets you tweak the Bluetooth name, choose any LED colour, and record a custom 2-second jingle straight from your mic—no IDE, no drivers.

Give it a spin: RASPIAUDIO ESP MUSE – Bluetooth speaker Customizator
Source code (firmware + web app): GitHub - RASPIAUDIO/Simple_Bluetooth_Speaker_ESP32: App for Muse LUXE speaker (ESP32 based)
Feedback and pull-requests are welcome—happy hacking!
This is a how-to guide to build a programmable Bluetooth speaker made from a 5 dollars second hand passive speaker found in a yard sale.

The benefits are :
-100% hackable as the MUSE PROTO uses an ESP32 and all the code is open sources you can what you want out of it (web radio, walkie talkie)
-It’s cheap as second-hand passive speakers are almost given
-It sounds good and has a retro style to it!
-It is what we call up-cycling, it’s even better than recycling as we make something better than the original product.
There are different possible levels for this project so you can start easily then add make it more refined later :
1-Quick and dirty (no soldering) :
Just add the MUSE PROTO to the usb port, upload the bin file and play a bluetooth stream from your phone. No need to plug an external speaker as there is already a built-in speaker onboard.
- Upload the bin file (see the section uploading code)
2-Intermediate :
Add an old passive speaker, and a rechargeable battery. The sound quality is a zillion times better than the on-board speaker.
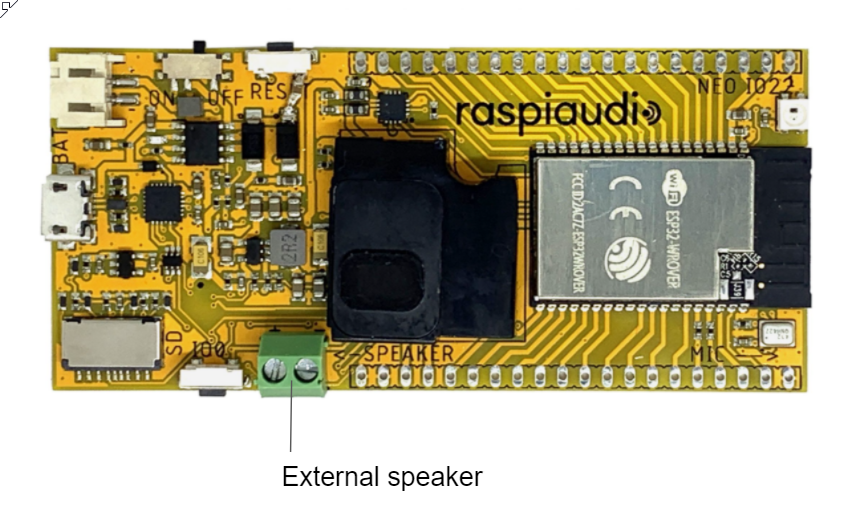
- Use the green screw connector to plug to your speaker.
- Connect a JST battery connector (check the polarity on the board first look for the ‘+’)
- Upload the bin file (see the section below)
3-Expert:
You want a nice durable casing, then you will need to print the casing
You can use a SIMPLE setup with just The Raspiaudio PROTO board and a passive speaker.
But if you want to do something that looks more better First print the 3D casing STL file are free to download in the description
To make the nice case you will need :
- [Raspi Audio ESP Proto Muse](ESPMUSE Proto esp32 - Scheda di sviluppo con Speaker e microfono…)
- 3.7v Battery 2000mAh or above with a JST 2mm connector
- 3 buttons
- 4 M3 screws
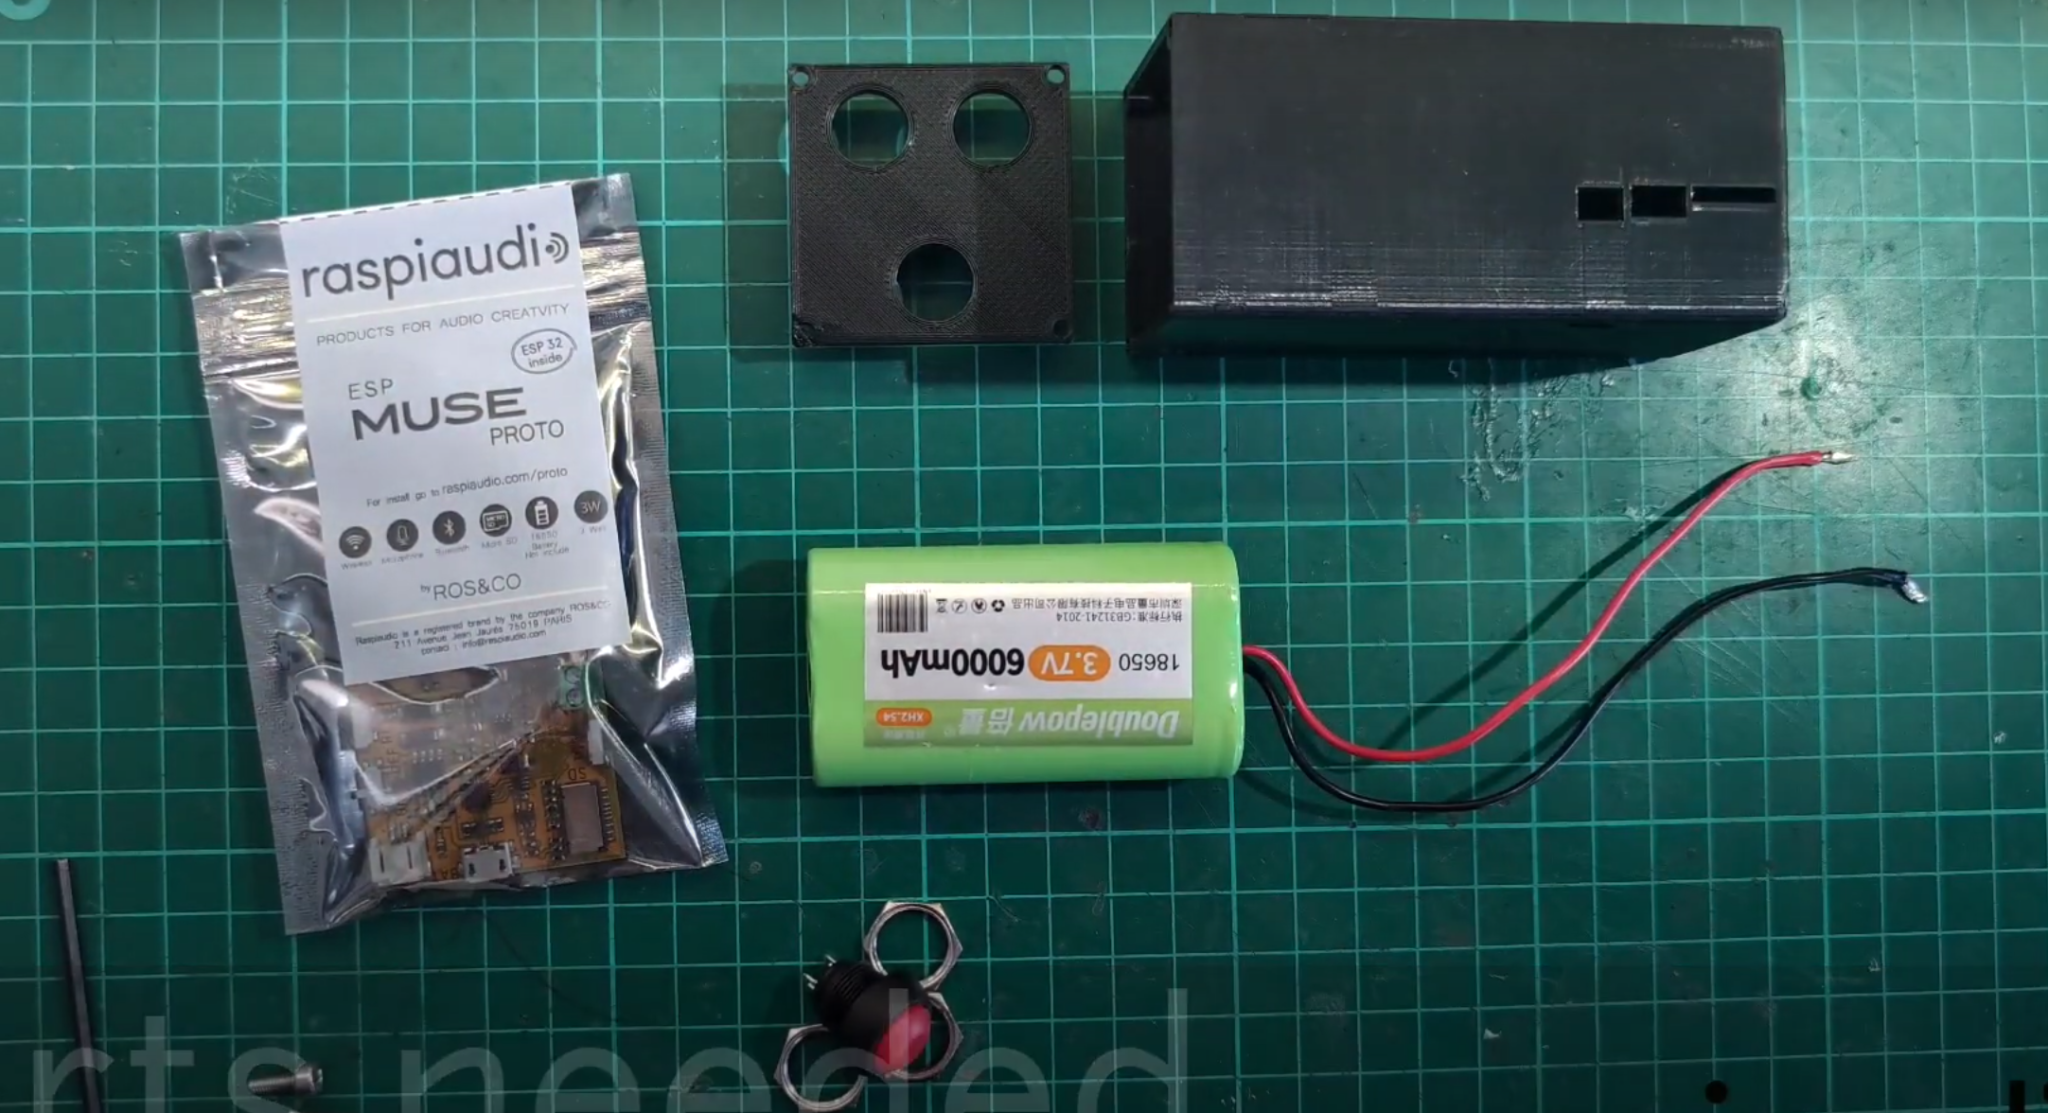
Required tools :
- A soldering iron and tin
Print the case :
Here is the stl files : https://github.com/RASPIAUDIO/museProto_speaker/raw/main/STL%20files%20casing.zip
I have used Cura as a slicer and printed with supports, pieces were placed like this:

**Adding buttons : **
This step is optional but doing this will give you the common on off button as well as up and down volume capabilities. You can also play the songs from a micro SD card and use a long press of VM and VP to change songs.
Buttons should be connected like this:
- VM (gpio 32 / pin 8)
- short press => volume -
- long press => backward (SD mode)
- VP (gpio 19 / pin 31)
- short press => volume +
- long press => forward (Sd mode)
- MU (gpio 12 / pin 14)
- short press => mute/unmute
- very long press => stop (deep sleep) / restart

Connect the battery
be careful of the polarity and of course avoid short-circuiting these wires
put everything in the box and screw everything together
Download the pre-compiled firmware
Now it’s time to download the pre-compiled firmware :
https://github.com/RASPIAUDIO/museProto_speaker/raw/main/simpleBT.bin
It must be loaded using the ESP32 flash downloading tool :
https://www.espressif.com/sites/default/files/tools/flash_download_tool_3.9.0_0.zip
Unzip it and execute
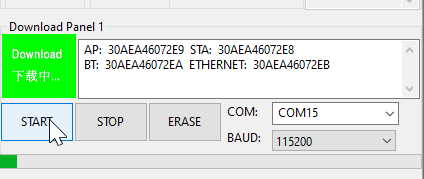
Choose Developer Mode / ESP32 :
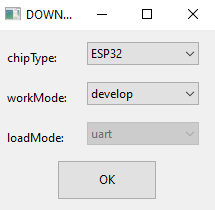
Select the path of the previously downloaded .bin file and set the loading address to “0x0” :

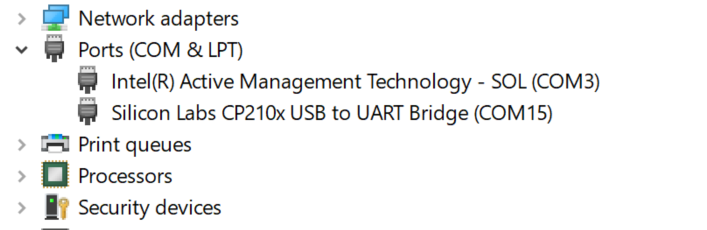
Connect the RASPIAUDIO MUSE PROTO via USB at the bottom select the right com port used by the connected board:

This com port number could change so if you are not sure of the com port go in windows 10 go to Device Manager and in the port section look for the number used by Silicon Lab…
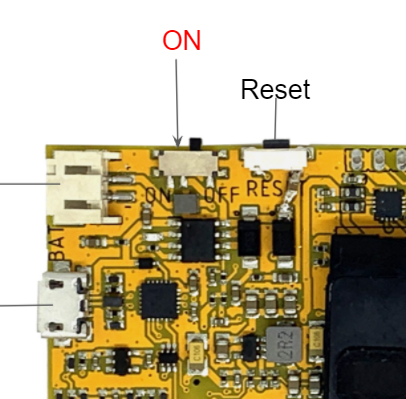
Check that the switch is ON position :
Click on START, it should now take 3mn to load:
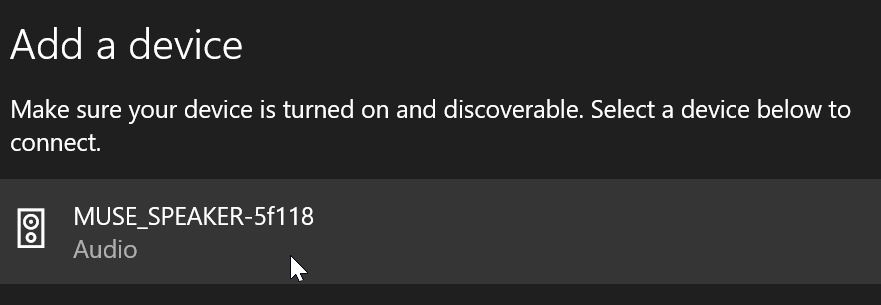
now you can try it on any speaker and connect your phone or computer in bluetooth your board name will be MUSE_SPEAKER-xxxxx :
To try it you can connect a temporary passive speaker or just connect nothing and by default it will use the on-board speaker.
Buy a second hand speaker
if everything is working it’s time to visit a secondhand shop or yard sale to find a speaker :

The beauty of this procedure is that you can try the speaker in the shop before deciding to buy anything. Just prepare in advance 2 wires from 2 the green terminal to the speaker :

finally i just added a nice handle and used some strong double-sided tape for the box
Now it’s time to go and impress your friends and party!

We encourage you to modify the Open Source code and write your own application, to edit the arduino
code please refer to that tutorial :

